Copying
This chapter gives you step-by-step instructions for copying documents.
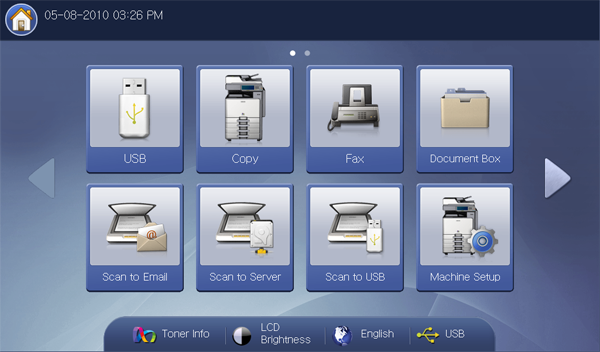
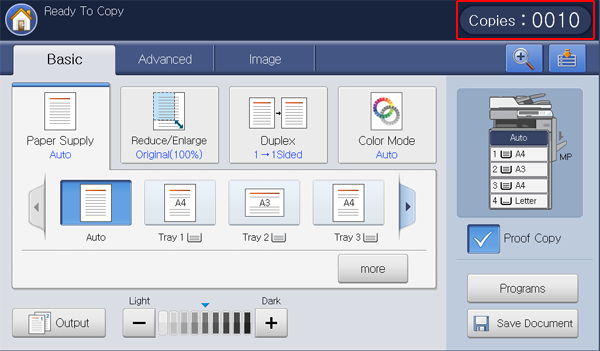
When you press from the
display screen, the screen
appears which has several tabs and lots of copying options. All
the options are grouped by features so that you can configure your
selections easily.If a different screen is displayed, press ( ) to
go to the home display screen.
tab
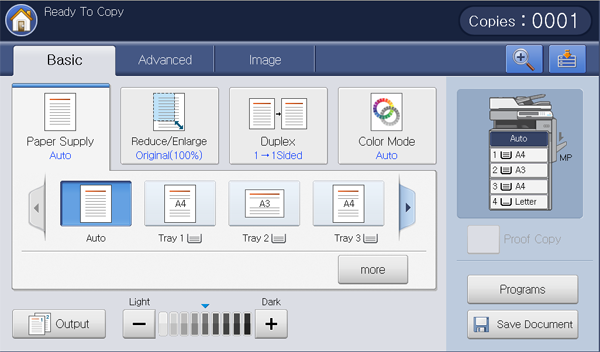
-
: Enters the number of copies.
-
: Selects the paper supply tray (see Selecting the paper supply tray).
-
: Reduces or enlarges the size of a copied image (see Reducing or enlarging copies).
-
: Sets the machine to print copies on both sides of the paper (see Copying multiple sides).
-
: Selects a color mode for making copies (see Selecting the color mode (CLX-9252 9352 Series only)).
-
: Sets the machine’s various output options (see Deciding the form of copy output).
-
Darkness: Adjusts the brightness level to make a copy for easier reading, when the original contains faint markings and dark images (see Changing the darkness).
-
: Allows you to print one copy first to check the quality, then print the rest of copies later (see Proof copying).
-
: Allows you to save the current settings for future use (see Using a programs setting).
-
: Saves document on the hard disk drive (HDD) in your machine (see Saving documents).
-
 This button allows you to look closely into some options or
you can see options as a whole by pressing
  .
. -
 This button allows you to move to , , , etc. Press this button and select
the menu you want to move to.
tab
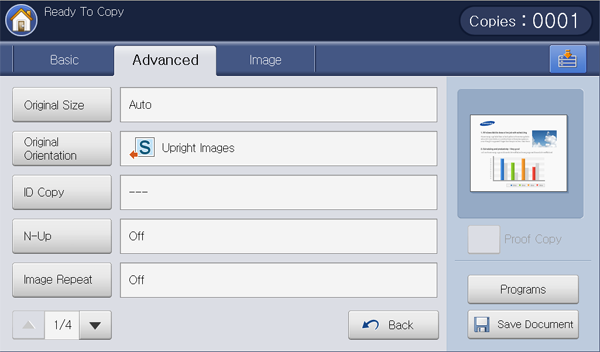
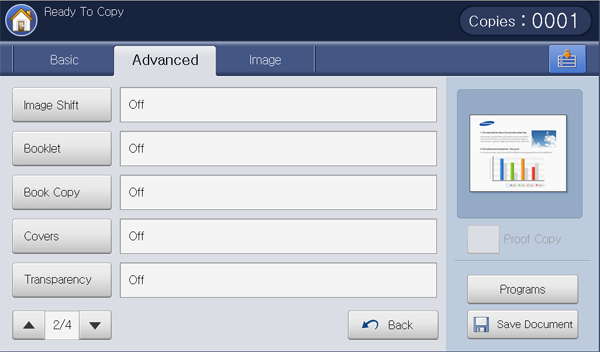
You can move to next or previous page using up/down arrows at the bottom left.
-
: Selects the actual paper size of the originals (see Selecting the size of originals).
-
: Selects the orientation of the originals (see Selecting the orientation of originals).
-
: Prints 2-sided originals on one sheet of paper. This feature is helpful for copying a small-sized item, such as a business card (see ID card copying).
-
: Prints 2 or more original images, reduced to fit onto one sheet of paper (see N-up copying).
-
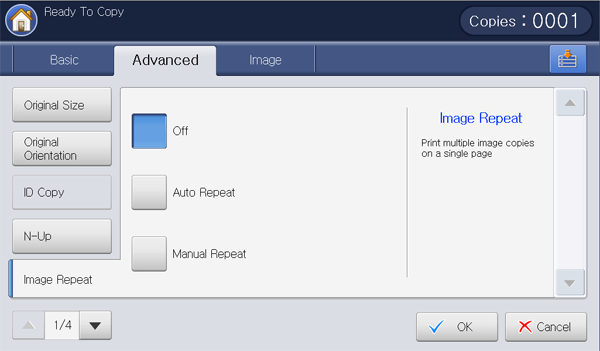
: Prints multiple image copies from the original document on a single page (see Image Repeat).
-
: Returns to the tab.
-
: Allows you to adjust the image’s position (see Image shift copying).
-
: Allows you to create booklets (see Booklet copying).
-
: Allows you to copy the left or/and right pages of book on separate output paper (see Book copying).
-
: Automatically adds covers taken from a different tray (see Cover copying).
-
: Adds a blank or printed separator between transparencies within a set (see Transparency copying).
-
: Returns to the tab.
-
: Allows you to print a watermark on printouts (see Watermark).
-
: Allows you to use a overlay to apply to copy outputs (see Overlay).
-
: Allows you to print with some information (see Stamp).
-
: Prints an image divided into 9 pages (see Poster copying).
-
: Speed up the copy scanning (see Selecting duplex scan speed).
-
: Sends an email notification after the copy job is completed (see Setting job completion notification).
-
: Returns to the tab.
-
: Allows you to copy several pages or different types of originals after all originals are scanned (see Build job).
-
: Returns to the tab.
tab
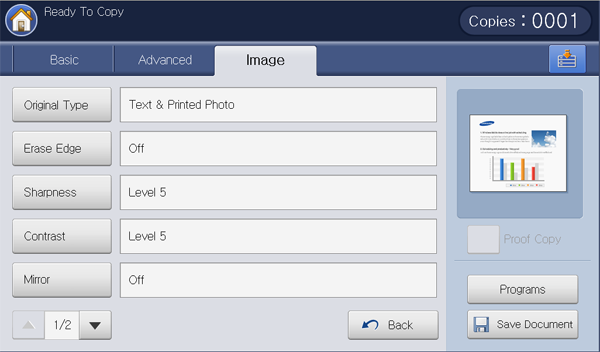
You can move to next or previous page using up/down arrows on the bottom left.
-
: Improves the copy quality by selecting the original’s type for the current copy job (see Selecting the type of originals).
-
: Allows you to erase specified areas of copies (see Erasing edges).
-
: Adjusts the sharpness level to make a copy that is easier to read (see Changing the sharpness).
-
: Adjusts the contrast level to make the image either soft or crisp (see Changing the contrast).
-
: Reverses the original image like a mirror (see Copying in a mirror image).
-
: Returns to the tab.
-
: Prints an image with a lighter background.(see Adjusting background).
-
: Prevents copying the original’s image shown through on the backside (see Erasing backside Images).
-
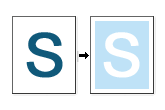
Negative Image: Allows you to copy the original image with the light- and dark-colored areas of the image inversed (see Copying in a negative image).
-
: Returns to the tab.
This is the normal and usual procedure for copying your originals.
-
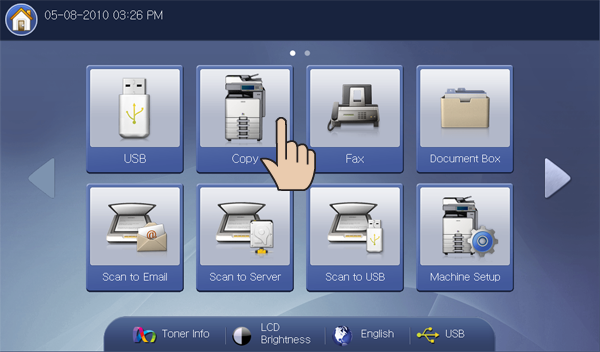
Press from the display screen.
-
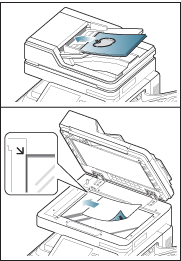
Place the originals face up in the DADF or place a single original face down on the scanner glass and close the DADF (see Loading originals).
-
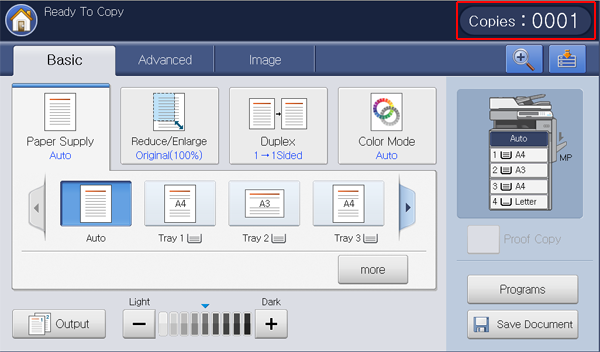
Adjust the settings for each copy such as , , and more in the tab (see Changing the settings for each copy).
-
Set the copy features in the or tabs, if necessary (see Using special copy features).
-
Enter the number of copies using the numeric keypad on the control panel, if necessary.
-
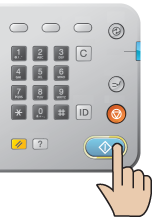
Press from the control panel to begin copying.
![[Note]](../common/note.png)
|
|
|
Copying different sized originals
This feature allows you to copy the different sized originals at once.
![[Note]](../common/note.png)
|
|
|
-
Press from the display screen.
-
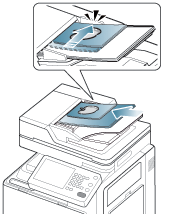
Place the different sized originals face up in the DADF. When you place them in the DADF, align and gently push them to the rear side of the DADF width guide.
-
Press the tab > > from the display screen.
![[Note]](../common/note.png)
is activated when the originals are placed in the DADF.
-
Adjust the settings for each copy such as , , and more in the tab (see Changing the settings for each copy).
-
Set the copy features in the or tab, if necessary (see Using special copy features).
-
Enter the number of copies using the numeric keypad on the control panel, if necessary.
-
Press from the control panel to begin copying.

Changing the settings for each copy
On the tab of the screen, you can select copy features before starting to copy.
![[Note]](../common/note.png)
|
|
|
The tab setting is only for the current copy job, which means the selected settings do not apply to the next copy job. After finishing the current copy job, the machine automatically restores the default settings, or when you press the button on the control panel. |
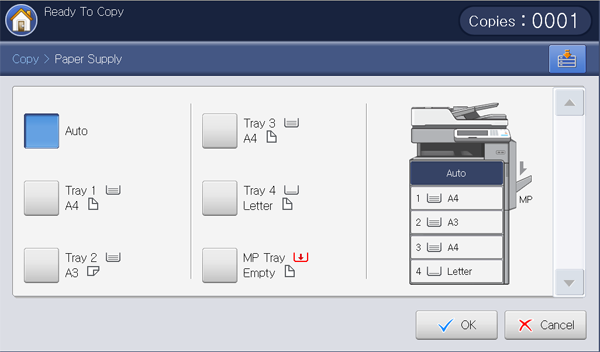
sets the tray containing the paper to be used for printing. The machine prints the scanned image on the paper in the selected tray. You can see the icons that show paper sizes and the remaining amount of paper in each tray.
Press the tab > , then press the appropriate paper tray.
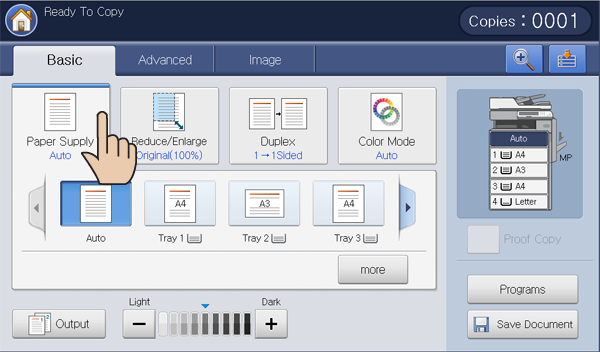
-
: Automatically detects the paper size with the paper tray.
![[Note]](../common/note.png)
When you use this option, in the tab is inactivated.
-
Other preset values: Check the paper size in each tray and press the tray containing the paper size you want.
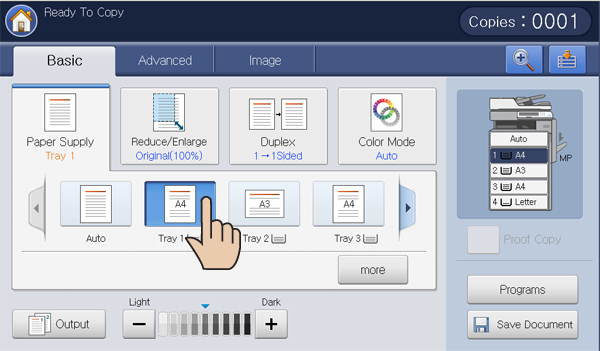
The tray icons below represent remained paper in each tray.
100 ~ 71%
70 ~ 31%
30 ~ 11%
Under 10%
Empty


You can also set a paper tray with the button.
Using the feature allows you print an original image reducing or enlarging it to the paper. You can press the icons that show how to reduce and enlarge copies. Also, if you press the button, you can reduce or enlarge by 1% between 25% and 400% to print a copy.
Press the tab > , then press the appropriate option to reduce or enlarge an image on the paper.
![[Note]](../common/note.png)
|
|
|
When you use this option, and in the tab are inactivated. |
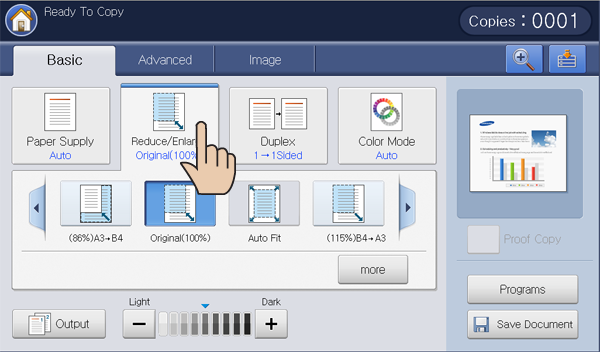
-
: Prints texts or images the same size as originals.
-
: Reduces or enlarges the original based on the size of the output paper.
-
Other preset values: Check the image and value on each icon and press the one you want to use.
You can also adjust to reduce or enlarge an image on the paper with the button.
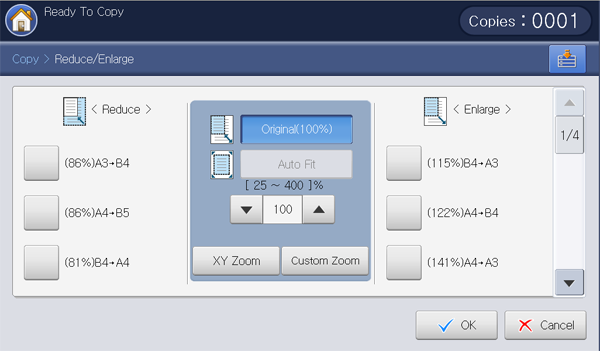
You can select an option by pressing a button in the and list. You can also reduce or enlarge by 1% between 25 ~ 400% to print a copy using the left/right arrows.
-
XY Zoom: This button allows you to set the reduce or enlarge each (width) and (Height) between 25 ~ 400%. Enter the value in the or input area using the numeric keypad.
-
Custom Zoom: You can set and save the custom zoom size using or . You can select the custom zoom size whenever you need it.
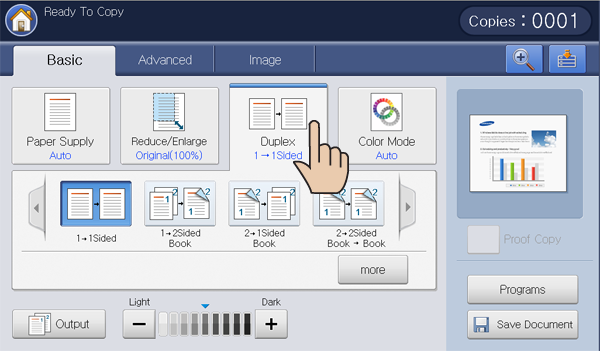
The duplex feature allows you to copy one sided or two sided originals on both sides of the paper or divide two-sided originals into multiple one-sided copies. Check the available paper using the feature. You can only use this feature with Letter SEF, Letter LEF, Ledger, Legal, Executive SEF, Statement SEF, A3, A4 SEF, A4 LEF, A5 SEF, B4, JIS B5 SEF, ISO B5 SEF, Tabloid Extra, 8K, 16K and Oficio.
![[Note]](../common/note.png)
|
|
|
Press the tab > , then press the appropriate duplex option.
![[Note]](../common/note.png)
|
|
|
If an original is placed on the scanner glass and you press , or , the message appears after the first page is copied. Load another original and press . When you finish, press on this window. |
-
: Scans one side of an original and prints it on one side of the paper. This function produces exactly the same printout from the originals.
-
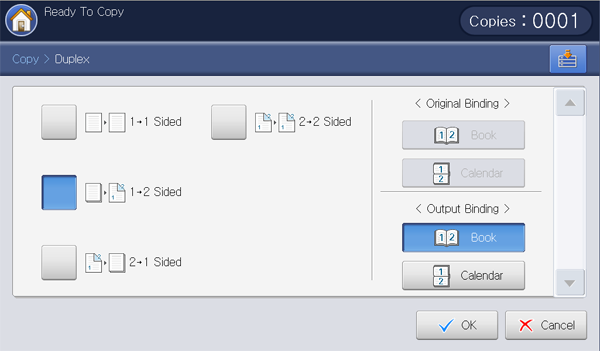
: Scans one side of originals and prints them on both sides of the paper.
You can select the output binding type either or with the button.
-
: Scans both sides of the originals and prints each of one on a separate paper.
You can select the original binding type, either or , with the button.
-
: Scans both sides of the original and prints on both sides of the paper. This function produces exactly the same printout from the originals.
You can select the original and output binding type, either or , with the button.
The machine provides many powerful effects on images without having expert editing skills.
Press the tab > , then select the color mode you want.
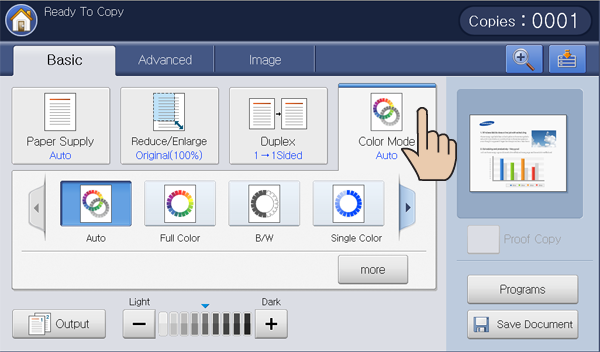
If you press the button, you can see more options.
-
: Select this setting to automatically detect whether the scanned document is in color or black and white, and then select an appropriate color setting.
-
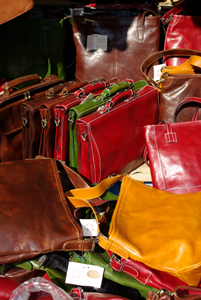
: Select this setting to print the same as the original image color.
Refer to the sample images below. Depending on the circumstances and quality of originals, the printout’s quality could be different from the sample image’s.
Original
Copy

-
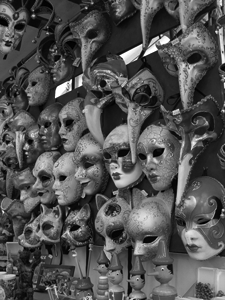
: Select this setting to print the copy in black and white, regardless whether the scanned document is in color or in black and white.
Refer to the sample images below. Depending on the circumstances and quality of originals, the printout’s quality could be different from the sample image’s.
Original
Copy

![[Note]](../common/note.png)
|
|
|
Press the tab > , then select the copy output options you want.
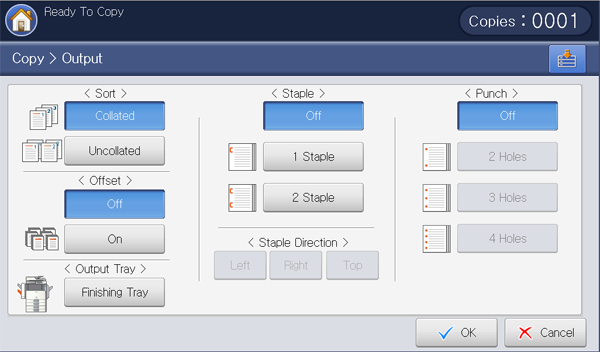
-
: When you copy several sets, you can select the sequence order of printouts.
-
: Printouts in sets to match the sequence of originals.

-
: Printouts sorted into stacks of individual pages.

-
-
: Printouts are stacked in sets by laying printouts side-to-side.
![[Note]](../common/note.png)
This feature is available only when the standard or booklet finisher is installed.
-
: Disables this feature.
-
: This feature can be used.

-
-
: Printouts are stacked criss-crossed in sets.
![[Note]](../common/note.png)
-
This feature is available only when the standard or booklet finisher is not installed.
-
This feature is available only with Letter- and A4-sized print media.
-
Before using this feature, you have to load the paper in the trays with SEF (Short edge feed) and LEF (Long edge feed). For example, direction of paper feeding in tray 1 is SEF, and direction of paper feeding in tray 2 is LEF.
-
: Disables this feature.
-
: This feature can be used.

-
-
: Select the output tray.
![[Note]](../common/note.png)
In CLX-9252 9352 Series, the right tray (face-up) is optional device.
In SCX-8230 8240 Series, the (optional Job Separator) is optional device.
-
: If you need to print thick paper or if the paper repetitively jams in the exit area of the center tray, use the right tray.
![[Note]](../common/note.png)
When you use the feature (see Copying multiple sides) with the as an output tray, it could slow down the printing speed. We recommend you to use other trays for an output tray.
-
: The inner tray is efficient for separating the printouts. For example, if you want to avoid received faxes mixing with copy or print outputs, you can use this inner tray to separate the received faxes.
-
: The machine sends output to the center tray by default.
-
![[Note]](../common/note.png)
|
|
|
When the optional standard finisher or booklet finisher is installed, you can use more output trays. 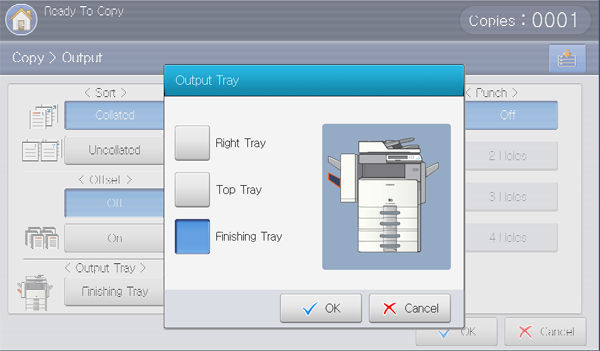
|
-
: You can staple printouts and adjust the stapling position.
![[Note]](../common/note.png)
-
The feature is available only when the standard or booklet finisher is installed.
-
When you use the feature, only the finishing tray is available for printouts.
-
When the printout is only one page, the feature does not work.
-
When you have set the the options before setting the options, some options are not available depending on the staple position and the direction of paper feeding in the trays.
-
When printing multiple copies of a job using the feature, it is recommend to monitor the finishing tray. Printouts can become crooked and fall off of the finishing tray.
-
: Disables this feature.
-
: Select this setting to bind the printouts with a staple. You can also select the staple positon with or in .
-
: Select this setting to bind the printouts with two staples. You can also select the staples positon in .
Depending on the options you select the result will vary. Refer to the below table before using the option.
Origianl orientation
(DADF/Scanner grass)
(display screen)
Direction of paper feeding in the tray
Available
Result
In the DADF

On the scanner grass


Long Edge Feed (LEF)
or
Left
Right


LEF

Short Edge Feed (SEF)


SEF
or
Left
Right
In the DADF

On the scanner grass


LEF

LEF
or
Left
Right

SEF
or
Left

Right


SEF
-
-
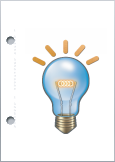
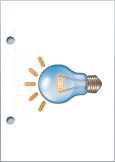
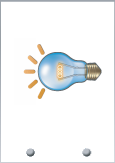
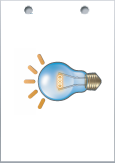
: Holes are punched in the printouts for filing purposes.
Depending on the options you select the result will vary. Refer to the below tables before using the option.
Origianl orientation
(DADF/Scanner grass)
(display screen)
Direction of paper feeding in the tray
Available punch position
Result
In the DADF

On the scanner grass


Long Edge Feed (LEF)
or
Left
Right


LEF

Short Edge Feed (SEF)


SEF
or
Left
Right
In the DADF

On the scanner grass


LEF


LEF
or
Left
Right


SEF
or
Left

Right


SEF

![[Note]](../common/note.png)
-
The hole punch function is available only when the punch kit is installed in the optional standard or booklet finisher.
-
Numbers of punched holes are depending on the punch kit. You can purchase the 2/3 hole punch kit or 2/4 hole punch kit.
-
When you use the punch feature, only the finishing tray is available for printouts.
-
When you have set the the options before setting the options, some options are not available depending on the number of staples, staple position and the direction of paper feeding in the trays.
-
: Disables this feature.
-
: Two holes are punched in the left, right, or top. When the loaded paper is short edge feeding, you can choose or ; while the loaded paper is long edge feeding, you can choose only .
-
: Three holes are punched in the left, right, or top. When the loaded paper is short edge feeding, you can choose or , while the loaded paper is long edge feeding, you can choose only .
-
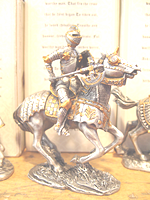
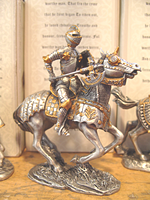
Press the tab. You can adjust the degree of darkness using the left/right arrows. This feature allows dark images to be printed into lighter images, or light images into darker images.
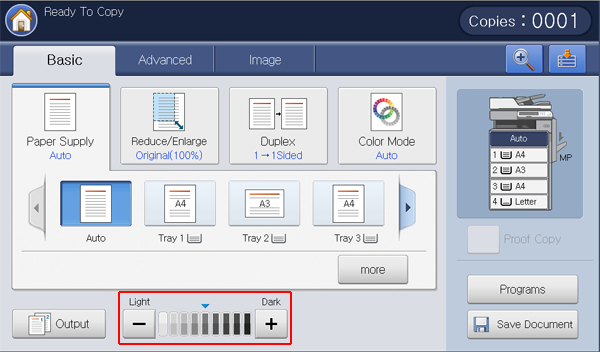
Refer to the sample images below. Depending on the circumstances and quality of originals, the printout’s quality could be different from the sample image’s.
|
Light |
Moderately light |
Original |
Moderately dark |
Dark |
|
|
|
|
|
This mode is useful when you print more than one copy. You can print one copy first to check the quality, then print the rest of copies later.
-
Press from the display screen.
-
Place the originals face up in the DADF or place a single original face down on the scanner glass and close the DADF (see Loading originals).
-
Adjust the settings for each copy such as , , and more in the tab (see Changing the settings for each copy).
-
Enter the number of copies using the numeric keypad.
-
Press .
-
Set the copy features in the or tabs, if necessary (see Using special copy features).
-
Press on the control panel to begin copying.
-
Check the quality of the printout.
-
When the proof copy confirmation window appears, if you like the printout quality, press . The rest of the copies will be printed out.
If you press , the rest of the copies will be cancelled.
Using special copy features
On the or tab of the screen, you can select specific copy features.
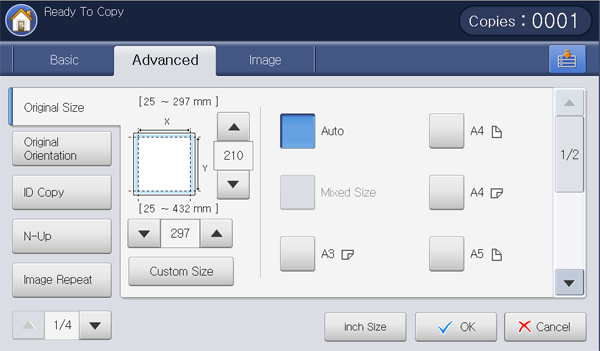
Copies can be produced after specifying the document scanning size if the document size cannot be detected automatically or if you wish to specify a certain document size.
-
Press from the display screen.
-
Place the originals face up in the DADF or place a single original face down on the scanner glass and close the DADF (see Loading originals).
-
Adjust the settings for each copy such as , , and more in the tab (see Changing the settings for each copy).
-
Press tab > from the display screen.
-
Select the original size.
![[Note]](../common/note.png)
You can change the paper list on the display screen pressing or . The paper list is divided into the available A/B size type and letter size type paper in this machine.
-
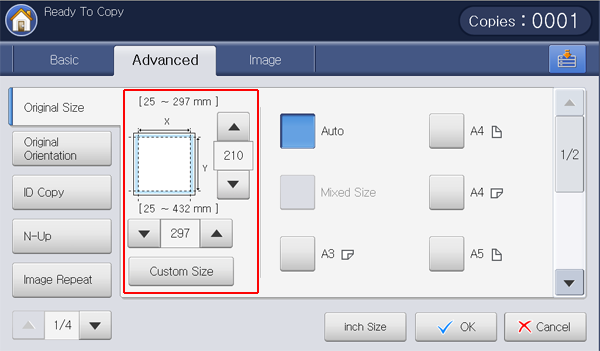
Custom: If there is no required size paper or you need to use custom sized paper, press the cardinal point arrows to set the original size. You can also set and save the custom size using . You can select the custom size whenever you need it.
![[Note]](../common/note.png)
The custom size is different depending on where the originals are placed.
In the DADF
On the scanner glass
Minimum size
128 x 128 mm
(5 x 5 inches)
25 x 25 mm
(1.0 x 1.0 inches)
Maximum size
297 x 432 mm
(11.7 x 17.0 inches)
297 x 432 mm
(11.7 x 17.0 inches)
-
: Automatically detects the size of originals, but this option is supported only when originals are Letter, Ledger, Legal, Statement, A3, A4, A5, B4, or JIS B5-sized.
-
: Allows the use of both of Letter and Legal-sized papers together, and the machine uses the proper-sized paper from several trays. For example, if the originals total 3 pages, the 1st page is letter-sized paper, the 2nd page is legal-sized paper, and the 3rd page is letter-sized paper, then the machine prints the output first letter, legal, and letter in order from several trays.
![[Note]](../common/note.png)
is activated when the originals are placed in the DADF.
-
Other preset values: You can select the size of original directly by pressing the buttons.
-
-
Press from the display screen.
-
Press on the control panel to begin copying.
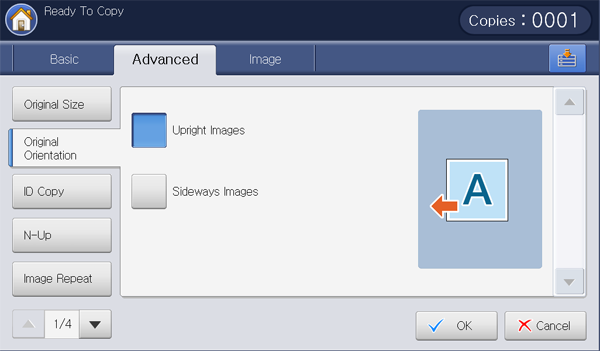
When copying double-sided documents or making double-sided copies or combined copies, specify the document orientation; otherwise, the copies may not be printed in the correct page order or correct front and back page arrangement.
-
Press from the display screen.
-
Place the originals face up in the DADF or place a single original face down on the scanner glass and close the DADF (see Loading originals).
-
Adjust the settings for each copy such as , , and more in the tab (see Changing the settings for each copy).
-
Press tab > from the display screen.
-
Select the orientation of the original document.
-
: Select this setting for an original document loaded with the top toward the back of the machine.
Using the DADF
Using the scanner glass
Icon


-
: Select this setting for an original document loaded into the DADF with the top of the original document toward the left side of the machine or an original document placed on the scanner glass with the top of the original document toward the right side of the machine.
Using the DADF
Using the scanner glass
Icon


-
-
Press from the display screen.
-
Press on the control panel to begin copying.
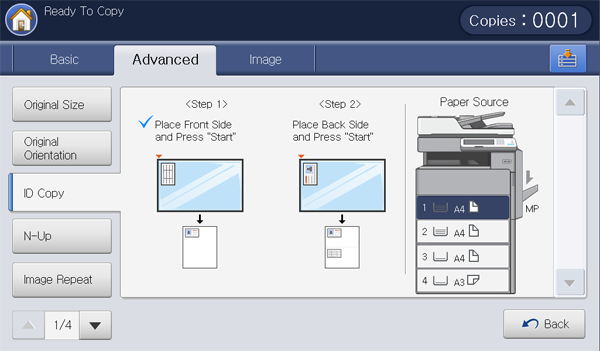
The machine prints one side of the original on the upper half of the paper and the other side on the lower half without reducing the size of the original.
This feature is helpful for copying a small-sized item, such as a business card.
![[Note]](../common/note.png)
|
|
|
-
Press from the display screen.
-
Press the tab > from the display screen.
-
Select a tray in .
-
Follow the steps on the display screen.
-
Place the front side of an original facing down on the scanner glass as shown below, and close the DADF.
![[Note]](../common/note.png)
When you place a original on the scanner glass, leave a little space between the edge of the scanner glass and the original. Otherwise, the part of original could not be printed.
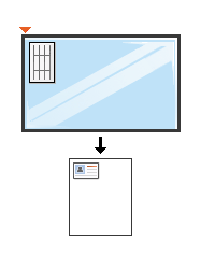
-
Press on the control panel. Then the machine starts scanning.
-
Turn the original over and place it on the scanner glass as shown below, and then close the DADF.
![[Note]](../common/note.png)
When you place a original on the scanner glass, leave a little space between the edge of the scanner glass and the original. Otherwise, the part of original could not be printed.
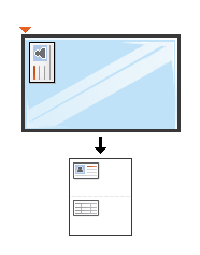
-
Press on the control panel to begin copying.
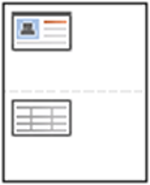
![[Note]](../common/note.png)
|
|
|
The machine reduces the size of the original images and prints 2 - 32 pages onto one sheet of paper.
![[Note]](../common/note.png)
|
|
|
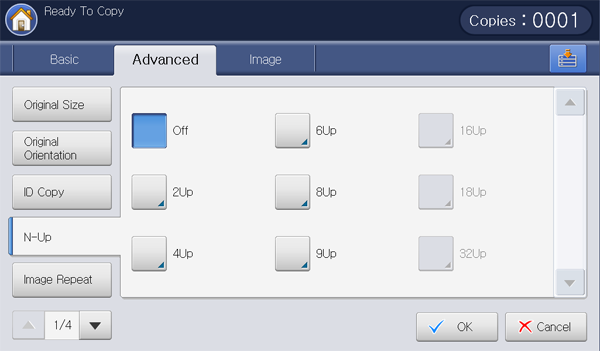
-
Press from the display screen.
-
Place the originals face up in the DADF or place a single original face down on the scanner glass and close the DADF (see Loading originals).
-
Press tab > from the display screen.
-
Press an option according to how many images to copy onto one page.
-
: Copies an original onto one sheet of paper.
-
~ : Copies corresponding numbers of separate originals to one page.
![[Note]](../common/note.png)
Depending on original document size, output paper size, and the reduced rate of image, some options may be inactivated.
-
-
Select a tray in .
-
Press the appropriate page order.
-
Depending on the options you select the result will vary. Refer to the below table before using the option.
Origianl orientation
(DADF/Scanner grass)
(display screen)
Direction of paper feeding in the tray
Available orientation
Result
In the DADF

On the scanner grass


or


In the DADF

On the scanner grass


LEF or SEF
In the DADF

On the scanner grass


LEF or SEF
or


In the DADF

On the scanner grass


LEF or SEF
[a] LEF meaning is Long Edge Feed.
[b] SEF meaning is Short Edge Feed.
-
All other page order options of N-up are the same except for the . You can press , , , and .
-
-
Press to print a border around each page on the sheet.
-
: Disables this feature.
-
: Prints a full line around each page.
-
: Prints a dotted line around each page.
-
: Prints a cross line around each page.
-
-
Press from the display screen.
-
Press on the control panel to begin copying.
If an original is placed on the scanner glass, the machine shows the window asking if you want to place another page. Load another original and press . When you finish, press on this window.


This option prints several copies of the original image on the same side of a single page. If you have other original in the DADF, all other original images get printed the same way.
![[Note]](../common/note.png)
|
|
|
-
Press from the display screen.
-
Place the originals face up in the DADF or place a single original face down on the scanner glass and close the DADF (see Loading originals).
-
Press the tab > from the display screen.
-
Press the appropriate option.
-
: Disables this feature.
-
: The number of images is automatically determined depending on the original image and the paper size. The number of repeating images will be automatically selected based on size of the original, size of output page and the reduce/enlarge ratio.

-
: You can select the number of images manually from , , , , or .

-
-
Press in to print a border around each page on the sheet.
-
: Disables this feature.
-
: Prints a full line around each page.
-
: Prints a dotted line around each page.
-
: Prints a cross line around each page.
-
-
Select a tray in .
-
Press from the display screen.
-
Press on the control panel to begin copying.
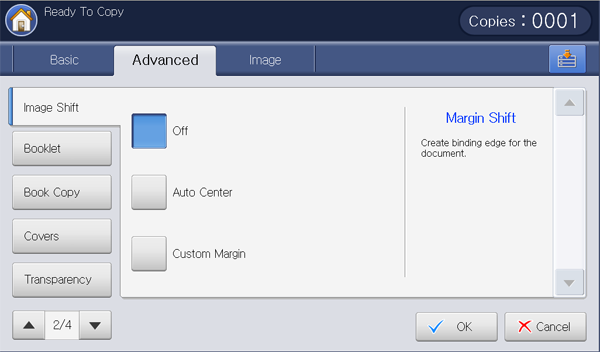
To avoid images overlapping with punch holes, staples, etc, you can move the image’s positon.
![[Note]](../common/note.png)
|
|
|
If you select in , this feature remains inactive. |
-
Press from the display screen.
-
Place the originals face up in the DADF or place a single original face down on the scanner glass and close the DADF (see Loading originals).
-
Adjust the settings for each copy such as , , and more in the tab (see Changing the settings for each copy).
-
Press the tab > from the display screen.
-
Press the appropriate option.
-
: Disables this feature.
-
: Automatically position at the center of the paper.
-
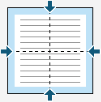
: You can adjust the margin of the paper.
-
: Adjusts the margin of the top or bottom of the paper using arrows.

-
: Adjusts the margin of the left or right of the paper using arrows.

-
-
-
Press from the display screen.
-
Press on the control panel to begin copying.
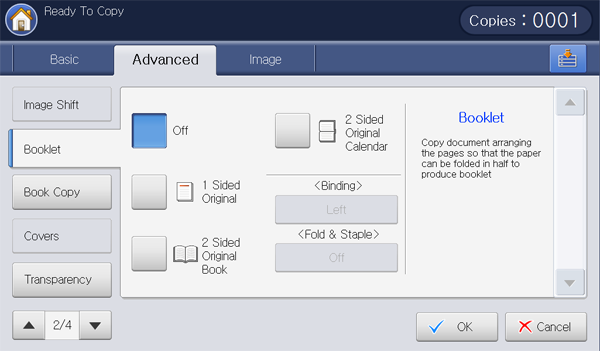
The machine automatically prints on one or both sides of the paper, which are then folded to produce a booklet with all the pages in the correct sequence.
The machine will also reduce and correctly adjust the position of each image to fit on the selected paper.
![[Note]](../common/note.png)
|
|
|
-
Press from the display screen.
-
Place the originals face up in the DADF or place a single original face down on the scanner glass and close the DADF (see Loading originals).
-
Adjust the settings for each copy such as , and more in the tab (see Changing the settings for each copy).
-
Press the tab > from the display screen.
-
Select a tray in .
![[Note]](../common/note.png)
If you need to use the option with the booklet finisher, you have to load the paper by short edge feeding.
-
Press the appropriate option.
-
: Disables this feature.
-
: Copies from one side of the original to one page of a booklet.
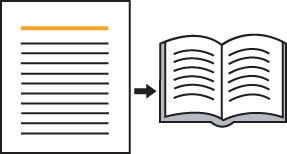
-
: Copies each side of an original to one page of a booklet.
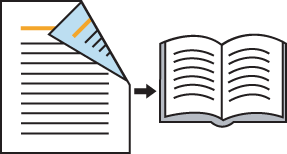
-
: Copies each side of an original to one page of a booklet. The second side of each original is rotated 180 degrees so the text will be upright in the booklet.
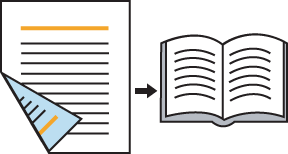
-
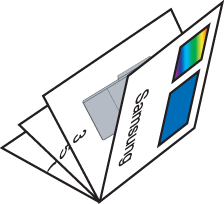
: Selects the direction of page order.
-
: Output booklet will be opened to the left.
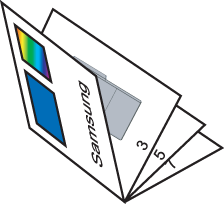
-
: Output booklet will be opened to the right.
-
-
: Select this setting to fold and staple printouts.
-
: Disables this feature.
-
: Select this setting to fold printouts. The printouts can also be bound with center staples.

-
: Select this setting to fold printouts only.

-
: If you copy a document containing many pages, select . You can divide the output booklet into multiple batches.The maximum number of sheets in a batch is 15 sheets.
For example, if you copy 80 pages of a document, and set the number to 10.
- First batch: 1~40 pages (10 sheets)
- Second batch: 41~80 pages (10 sheets)
-
-
-
Press from the display screen.
-
Press on the control panel to begin copying.
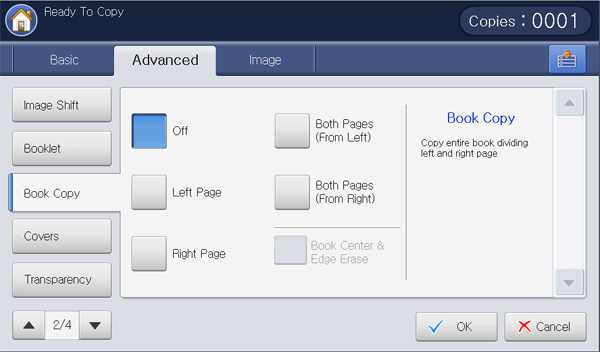
Use this feature to copy a book. If the book is too thick, lift the DADF until its hinges are engaged by the stopper and then close the DADF. If the book or magazine is thicker than 30 mm (1.18 inches), start copying with the DADF open.
![[Note]](../common/note.png)
|
|
|
-
Press from the display screen.
-
Place a page of book face down on the scanner glass and close the DADF (see Loading originals).
![[Note]](../common/note.png)
-
When you place a book on the scanner glass, leave a little space (about 10 mm) between top or bottom edge of the scanner grass and the book. If you want to get the printouts well, follow the recommendation.
-
Some books may not be available in this feature such as a hard-cover book, poor bound, etc.
-
-
Adjust the settings for each copy such as , , and more in the tab (see Changing the settings for each copy).
-
Press the tab > from the display screen.
-
Press the appropriate option.
-
: Disables this feature.
-
: Prints only the left page of the book.

-
: Prints only the right page of the book.

-
: Prints both facing pages from a left page.

-
: Prints both facing pages from a right page.

-
: Erases shadows of a binding or book edge from the center and side edges of copies.
-
-
Press from the display screen.
-
Press on the control panel to begin copying.
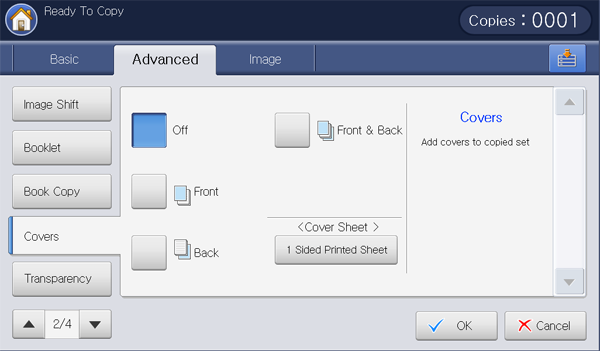
The machine automatically adds covers to your copied set using stock taken from a different tray. Covers must be the same size and orientation as the main body of the job.
![[Note]](../common/note.png)
|
|
|
You cannot use this feature while using (see Booklet copying). |
-
Press from the display screen.
-
Place the originals face up in the DADF or place a single original face down on the scanner glass and close the DADF (see Loading originals).
-
Select the tray, other than , that has the cover paper loaded in the tab.
![[Note]](../common/note.png)
-
If you select , the feature remains inactive.
-
You have to select a tray that has paper of the same size and orientation as the originals.
-
-
Adjust the settings for each copy such as , and more in the tab (see Changing the settings for each copy).
-
Press the tab > from the display screen.
-
Press the appropriate option.
-
: Disables this feature.
-
: Prints the document with the front cover.
-
: Prints the document with the back cover.
-
: Prints the document with the front and back cover.
-
-
Press in to select if the cover will be 1-sided, 2-sided, or blank paper.
-
Select a tray in .
-
Press from the display screen.
-
Press on the control panel to begin copying.

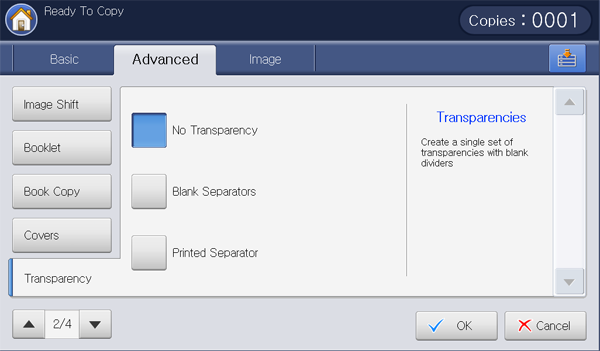
This feature prevents copies to print onto transparencies from sticking together as a cause by heat that is produced during copying. You can also copy originals to the separator sheets.
-
Place the originals face up in the DADF or place a single original face down on the scanner glass and close the DADF (see Loading originals).
-
Load the right-sized transparencies with the side to be printed facing down on the multi-purpose tray.
-
Press > > > > > > from the display screen.
-
Press (
 ) and from the display screen.
 -
Press the tab > from the display screen.
-
Press the appropriate option.
-
: Does not place separator sheets between transparencies.
-
: Places a blank sheet between transparencies. Select a tray which loaded paper for separating from .
-
: Places the same image on the separator sheets as printed on the transparency. Select a tray which loaded paper for separating from .
-
-
Press from the display screen.
![[Note]](../common/note.png)
If you did not select in step 3, a pop-up window appears.
-
Press on the control panel to begin copying.
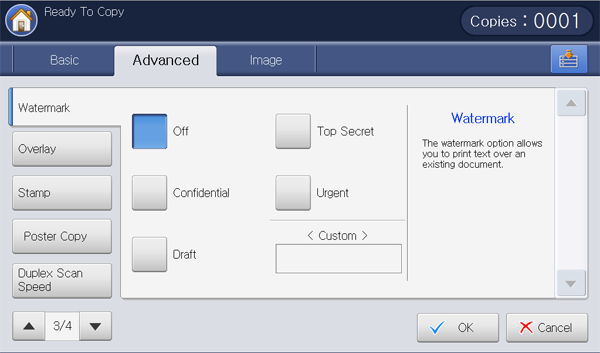
The watermark option allows you to print text over an existing document. For example, you use it when you want to have large gray letters reading “DRAFT” or “CONFIDENTIAL” printed diagonally across the first page or all pages of a document.
![[Note]](../common/note.png)
|
|
|
This feature may not be available depending on models or option kits installed. |

There are several predefined watermarks that come with the machine. You can also enter a watermark you want.
![[Note]](../common/note.png)
|
|
|
When you use this option, in the tab is inactivated. |
-
Press from the display screen.
-
Place the originals face up in the DADF or place a single original face down on the scanner glass and close the DADF (see Loading originals).
-
Adjust the settings for each copy such as , , and more in the tab (see Changing the settings for each copy).
-
Press the tab > from the display screen.
-
Press the appropriate option.
-
: Disables this feature.
-
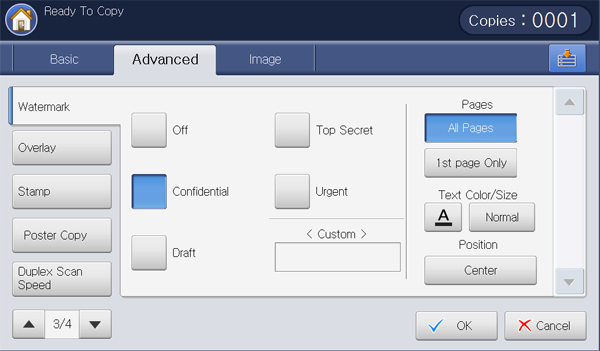
Other preset values: Allows you to easily select values commonly used.
-
: Allows you to enter a text message using the pop-up keyboard.
-
-
Set the settings.
-
: Select to print the option on all pages or only the first page.
-
: Select the text message color and size.
-
: Select the printed position of the text message.
-
-
Press from the display screen.
-
Press on the control panel to begin copying.
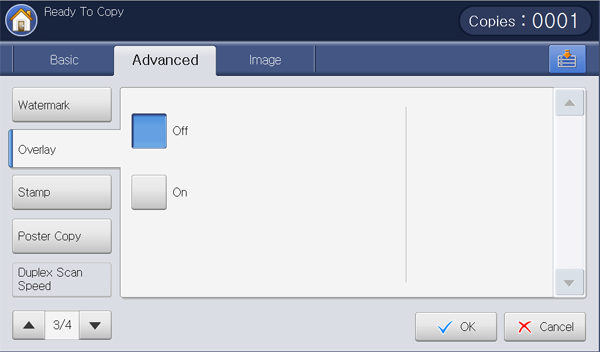
An overlay is text and/or images stored on the hard drive as a special file format that can be printed on any document. You can store scanned forms on the hard drive as an overlay to apply to copy output.
![[Note]](../common/note.png)
|
|
|
When you use this option, and in the tab is inactivated. |
-
Press from the display screen.
-
Place the originals face up in the DADF or place a single original face down on the scanner glass and close the DADF (see Loading originals).
-
Adjust the settings for each copy such as , , and more in the tab (see Changing the settings for each copy).
-
Press the tab > > from the display screen.
-
Press the appropriate option.
![[Note]](../common/note.png)
If the feature is set with the mode from > > > by your administrator, you cannot set and change all overlay options. The overlay option the administrator set is applied to all copies. Contact your administrator.
-
: Disables this feature.
-
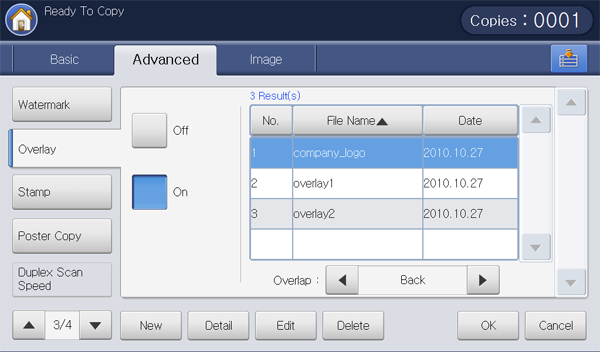
: This feature can be used.
-
: Makes a new overlay form. This option is available only when you place originals on the scanner glass.
-
: Displays information of the selected overlay form. You can preview and print the stored overlay form.
-
: Changes the name of the selected overlay form.
-
: Deletes the selected overlay form.
-
Overlap: You can select the overlap option for applying the overlay.
-
Front: The overlay will be printed in front of the text. Some text might not be shown under the overlay.
-
Back: The overlay will be printed behind the text.
-
Transparent: The overlay will be applied transparently.
-
-
-
Select a overlay form from the list and press from the display screen.
-
Press on the control panel to begin copying.
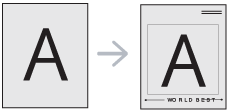
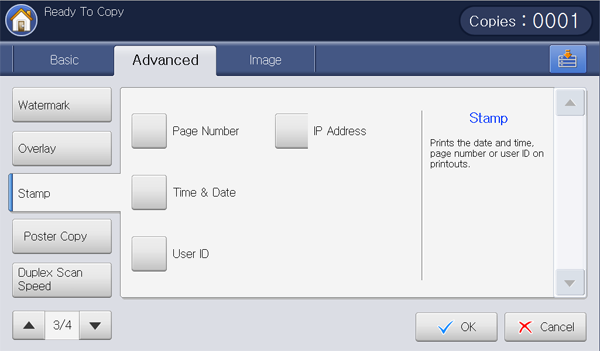
Prints the date and time, page number, or user ID on printouts.
![[Note]](../common/note.png)
|
|
|
When you use this option, and in in the tab is inactivated. |
-
Press from the display screen.
-
Place the originals face up in the DADF or place a single original face down on the scanner glass and close the DADF (see Loading originals).
-
Adjust the settings for each copy such as , , and more in the tab (see Changing the settings for each copy).
-
Press the tab > from the display screen.
-
Press the appropriate option.
-
: This option allows you to print page numbers on the printouts.
-
Time & Date: This option allows you to print time and date stamps on the printouts.
-
: This option allows you to print a user ID on the printouts.
-
: This option allows you to print a IP Address on the printouts.
-
-
Press to use the selected option.
-
Set the settings.
-
: Select to print the option on all pages or only the first page.
-
: Select the printed position of the text.
-
: Select the text color and size.
-
-
Press from the display screen.
-
Press on the control panel to begin copying.
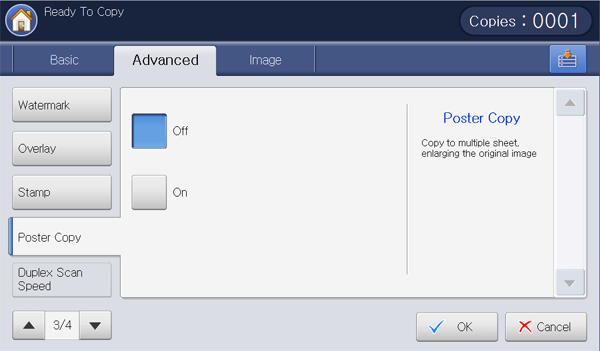
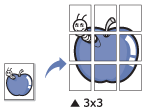
Your original will be divided into 9 portions. You can paste the printed pages together to make one poster-sized document.
![[Note]](../common/note.png)
|
|
|
-
Press from the display screen.
-
Place a single original face down on the scanner glass and close the DADF (see Loading originals).
-
Adjust the settings for each copy such as , and more in the tab (see Changing the settings for each copy).
-
Press the tab > .
-
Press to activate this feature.
-
Select a tray in .
-
Press from the display screen.
-
Press on the control panel to begin copying.
![[Note]](../common/note.png)
Your original is divided into 9 portions. Each portion is scanned and printed one by one in the following order:

This option allows you to speed up the copy scanning. In this case, you can save the working hours. But, the copy quality could be reduced.
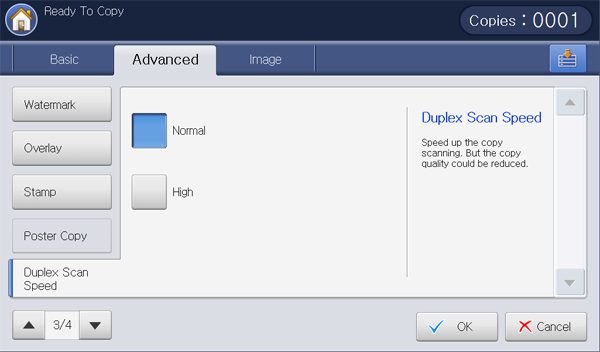
-
Press from the display screen.
-
Place a single original face down on the scanner glass and close the DADF (see Loading originals).
-
Adjust the settings for each copy such as , , and more in the tab (see Changing the settings for each copy).
-
Press the tab > .
-
Press to activate this feature.
-
Press from the display screen.
-
Press on the control panel to begin copying.
When a copy job is completed, this machine can send the completion notification using an email. This feature is helpful for a large copy job. You do not need to wait beside the machine until the copy job is completed .
![[Note]](../common/note.png)
|
|
|
To recieve the job completion notification, you need to set up network parameters and email settings using the control panel or SyncThru™ Web Service. For details about how to set up the network parameters and email settings, refer to the Administrator’s Guide on the supplied CD. |
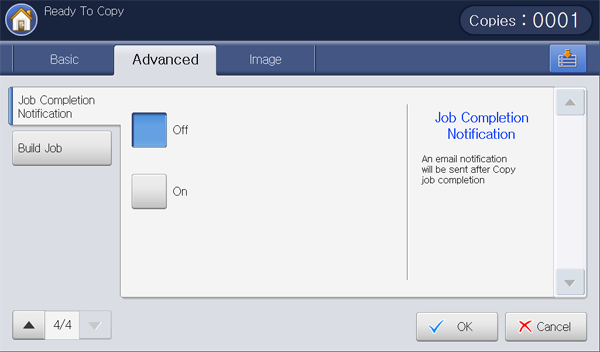
-
Press from the display screen.
-
Place the originals face up in the DADF or place a single original face down on the scanner glass and close the DADF (see Loading originals).
-
Adjust the settings for each copy such as , , and more in the tab (see Changing the settings for each copy).
-
Set the copy features in the or tabs, if necessary (see Using special copy features).
-
Enter the number of copies using the numeric keypad on the control panel, if necessary.
-
Press the tab > .
-
Press to activate this feature.
-
Press input area. The pop-up keyboard appears.
Enter the email address which you want to recieve the job completion notification. Press . You can also
![[Note]](../common/note.png)
-
You can select the email address pressing .
-
You can enter an email address only.
-
-
Press from the display screen.
-
Press on the control panel to begin copying.
This feature allows you to copy various originals at once consisting of multiple batches and/or different sizes. The copy job will start after scanning all originals.
-
Press from the display screen.
-
Place the originals face up in the DADF or place a single original face down on the scanner glass and close the DADF (see Loading originals).
-
Adjust the settings for each copy such as , , and more in the tab (see Changing the settings for each copy).
-
Set the copy features in the or tabs, if necessary (see Using special copy features).
-
Press the tab > from the display screen.
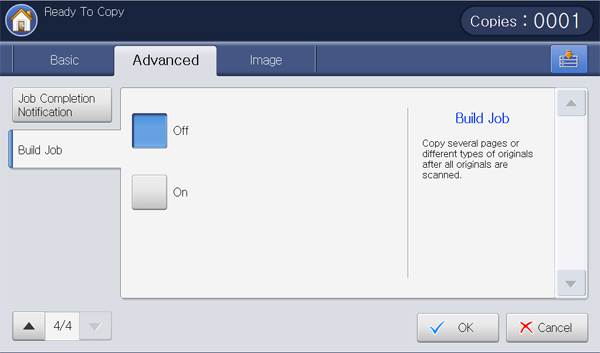
-
Press . The machine starts to scanning.
After the scanning, the machine shows the window asking to place another page. Load another original and press . You can change the copy setting pressing , if necessary. When you finish, select on this window.
-
The machine starts to print out.
The original type setting is used to improve copy quality by selecting document types for current copy jobs.
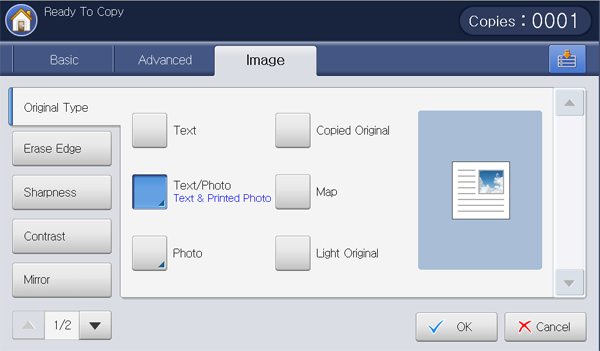
-
Press from the display screen.
-
Place the originals face up in the DADF or place a single original face down on the scanner glass and close the DADF (see Loading originals).
-
Adjust the settings for each copy such as , , and more in the tab (see Changing the settings for each copy).
-
Press the tab > from the display screen.
-
Press the appropriate option.
-
: Use for originals containing mostly text.
-
: Use for originals contain text mixed with photographs.
-
: Use for photographs.
-
: Use for copied documents.
-
: Use for maps.
-
: Use for light documents.
-
-
Press from the display screen.
-
Press on the control panel to begin copying.
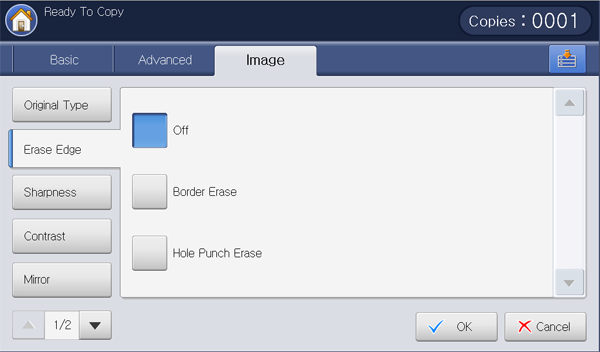
You can copy the original without any edges or margins.
![[Note]](../common/note.png)
|
|
|
You cannot use this feature while using (see Book copying). |
-
Press from the display screen.
-
Place the originals face up in the DADF or place a single original face down on the scanner glass and close the DADF (see Loading originals).
-
Adjust the settings for each copy, such as , , and more in the tab (see Changing the settings for each copy).
-
Press the tab > from the display screen.
-
Press the appropriate option.
-
: Disables this feature.
-
: Erases an equal amount of edges from all copies.
-
: Erases hole-punch marks from the left edge of the copies.
-
-
Press from the display screen.
-
Press on the control panel to begin copying.

Set this parameter to emphasize the edges to make text more readable. This parameter can also be used to adjust the original image.
-
Press from the display screen.
-
Place the originals face up in the DADF or place a single original face down on the scanner glass and close the DADF (see Loading originals).
-
Adjust the settings for each copy, such as , , and more in the tab (see Changing the settings for each copy).
-
Press the tab > from the display screen.
-
Press the left/right arrow to change the level you want.
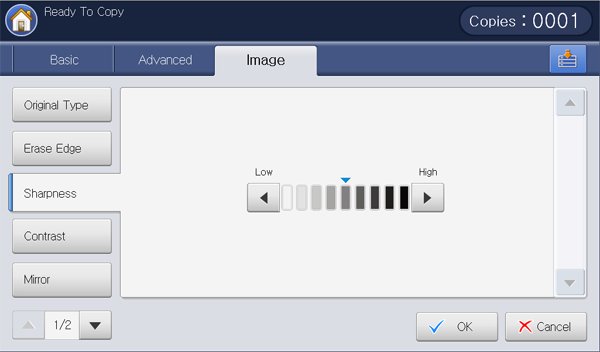
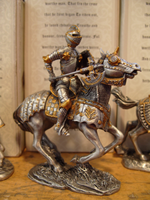
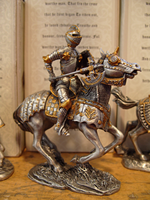
Refer to the sample images below. Depending on the circumstances and quality of originals, the printout’s quality could be different from the sample image’s.
Low
Moderately low
Original
Moderately high
High

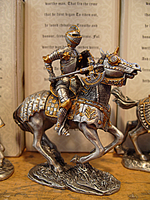
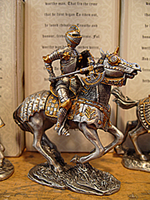
-
Press from the display screen.
-
Press on the control panel to begin copying.
Set this parameter to adjust the contrast between Low and High.
-
Press from the display screen.
-
Place the originals face up in the DADF or place a single original face down on the scanner glass and close the DADF (see Loading originals).
-
Adjust the settings for each copy such as , , and more in the tab (see Changing the settings for each copy).
-
Press the tab > from the display screen.
-
Press the left/right arrows to change the level.
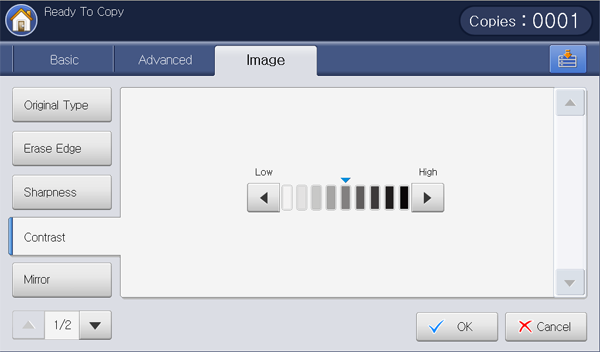
Refer to the sample images below. Depending on the circumstances and quality of originals, the printout’s quality could be different from the sample image’s.
Low
Moderately low
Original
Moderately high
High
-
Press from the display screen.
-
Press on the control panel to begin copying.
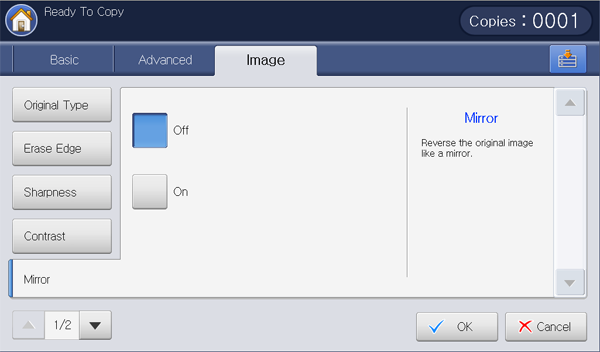
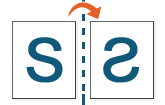
This feature allows you to copy in a mirror image.
-
Press from the display screen.
-
Place the originals face up in the DADF or place a single original face down on the scanner glass and close the DADF (see Loading originals).
-
Adjust the settings for each copy such as , , and more in the tab (see Changing the settings for each copy).
-
Press the tab > from the display screen.
-
Press to activate this feature.
-
Press from the display screen.
-
Press on the control panel to begin copying.
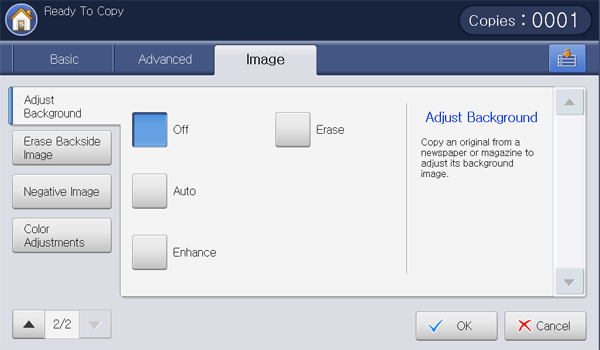
This feature is helpful when copying originals containing color in the background, such as in newspapers or catalogs.
-
Press from the display screen.
-
Place the originals face up in the DADF or place a single original face down on the scanner glass and close the DADF (see Loading originals).
-
Adjust the settings for each copy such as , , and more in the tab (see Changing the settings for each copy).
-
Press the tab > .
-
Press the appropriate option.
-
: Disables this feature.
-
: Optimizes the background.
-
: The higher the number is, the more vivid the background.
-
: The higher the number is, the lighter the background.
-
-
Press from the display screen.
-
Press on the control panel to begin copying.
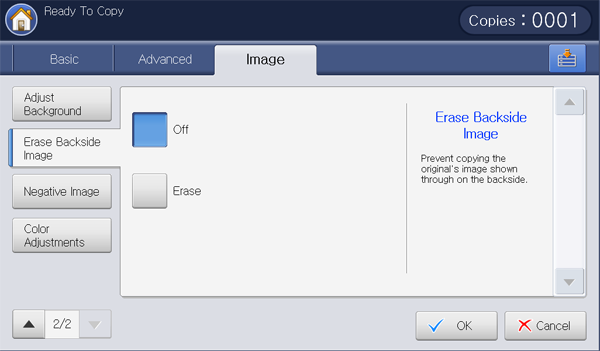
When the original is thin and backside images are shown through, you can use this feature to remove the backside images.
-
Press from the display screen.
-
Place the originals face up in the DADF or place a single original face down on the scanner glass and close the DADF (see Loading originals).
-
Adjust the settings for each copy such as , , and more in the tab (see Changing the settings for each copy).
-
Press the tab > .
-
Press the appropriate option.
-
: Disables this feature.
-
: The higher the number is, the lighter the backside image is.
-
-
Press from the display screen.
-
Press on the control panel to begin copying.
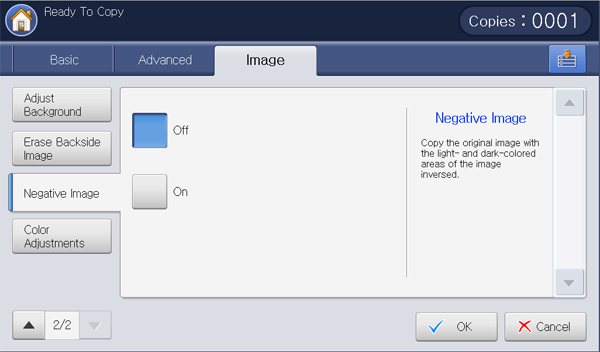
Set this feature to copy the original with the light- and dark-colored areas or the colors of the image inversed.
-
Place the originals face up in the DADF or place a single original face down on the scanner glass and close the DADF (see Loading originals).
-
Press the tab > from the display screen.
-
Press to activate this feature.
-
Press from the display screen.
-
Press on the control panel to begin copying.
This option allows you to save the current settings for future use. You can also use the previous settings from the last jobs.
Saving
-
Press from the display screen.
-
Adjust the settings for each copy such as , , and more in the tab (see Changing the settings for each copy).
-
Set the copy features in the or tabs, if necessary (see Using special copy features).
-
Press the tab or .
-
Enter the number of copies using the numeric keypad on the control panel, if necessary.
-
Press .
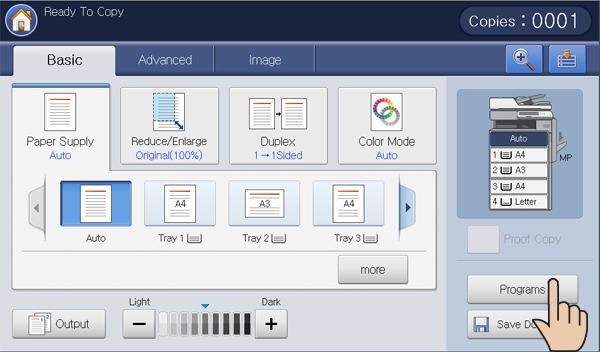
-
Press input area. The pop-up keyboard appears.
Enter the program name you want. Press .
![[Note]](../common/note.png)
You can see the values of set by scrolling up or down and check the values using the up/down arrows.
-
Press . When the confirmation window appears, the settings you set are saved. Click or .
Using
-
Press from the display screen.
-
Place the originals face up in the DADF or place a single original face down on the scanner glass and close the DADF (see Loading originals).
-
Press > .
-
Press a program name you want to use on the list.
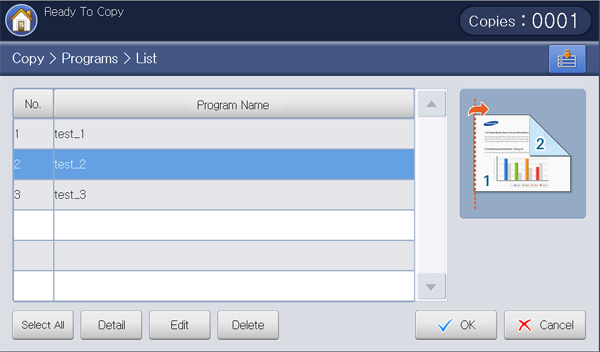
-
Press .
-
Press when the confirmation window appears.
The machine is now set to copy according to the setting you selected.
-
Press from the control panel to begin copying.
Managing
-
Press from the display screen.
-
Press > .
-
Press the appropriate option.
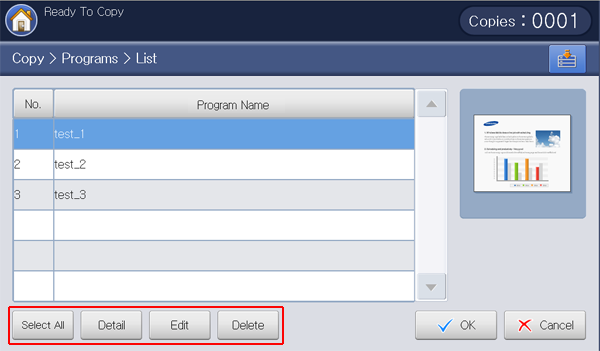
-
: Selects all programs for deleting all.
-
: Displays detailed information of the selected program.
-
: Changes the name of the selected program.
-
: Removes the selected programs.
-
-
Press for return to the tab.
Using previous settings
-
Press from the display screen.
-
Place the originals face up in the DADF or place a single original face down on the scanner glass and close the DADF (see Loading originals).
-
Press .
-
Select a previous setting you want to use.
For example, if you want to use the settings from the last job, press .
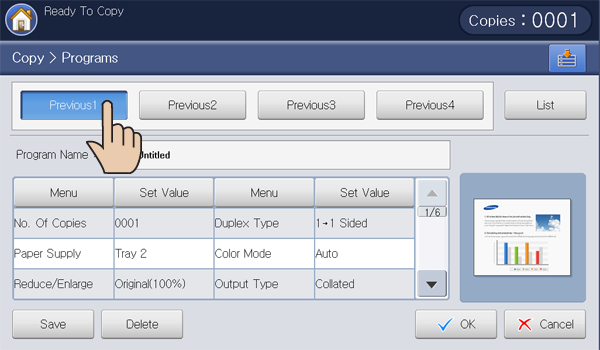
-
Press .
-
Press when the confirmation window appears.
The machine is now set to copy according to the setting you selected.
-
Press from the control panel to begin copying.
You can save the scanned originals to (HDD) in your machine. The documents saved in can be printed if necessary.
![[Note]](../common/note.png)
|
|
|
-
Press from the display screen.
-
Place the originals face up in the DADF or place a single original face down on the scanner glass and close the DADF (see Loading originals).
-
Adjust the settings for each copy such as , , and more in the tab (see Changing the settings for each copy).
-
Set the copy features in the or tabs, if necessary (see Using special copy features).
-
Enter the number of copies using the numeric keypad, if necessary.
-
Press .
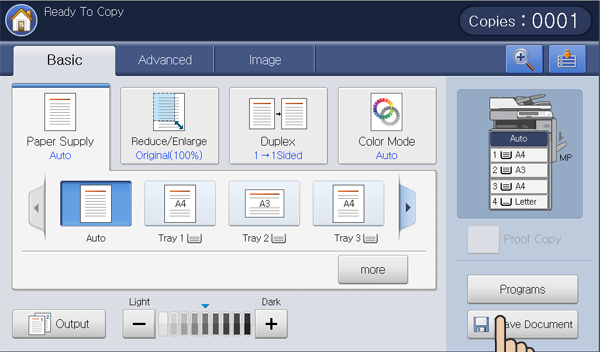
-
Press or .
-
: Disables this option.
-
: Prints and stores scanned originals.
-
: Stores scanned originals only.
-
-
Press the input area. The pop-up keyboard appears.
-
Enter the file name you want. Press .
-
Select a destination box and press .
-
Press from the control panel to begin copying and storing, or storing only.
![[Note]](../common/note.png)
|
|
|
To cancel the current copy job, press on the control panel. Or you can delete current and pending jobs using on the control panel. Select the job you want to cancel and press (see button). |
The menu allows you to quickly set copy options without having to move to a lower level menu or another tab. But, this menu does not provide all copy options. If you need to use other copy options, use the copy options in the menu (see Changing the settings for each copy or Using special copy features).
-
Press from the display screen.
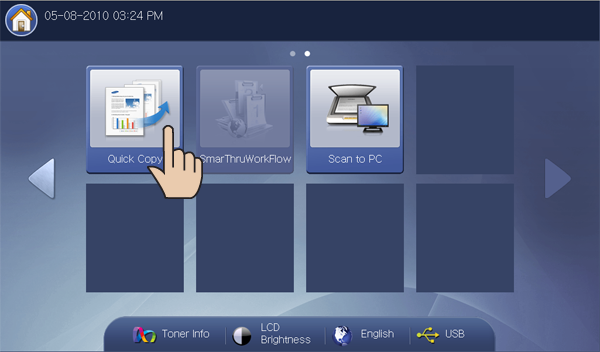
-
Place the originals face up in the DADF or place a single original face down on the scanner glass and close the DADF (see Loading originals).

-
Adjust the settings for each copy such as , , , , etc.
![[Note]](../common/note.png)
You can set the default options from > > from the display screen. Set the most frequently used settings.
-
Enter the number of copies using the numeric keypad on the control panel, if necessary.
-
Press from the control panel to begin copying.

