using Smarthru Workflow, shared Folder, and stored document
This chapter explains how to use SmarThru Workflow with your machine.
This chapter includes:
About SmarThru Workflow
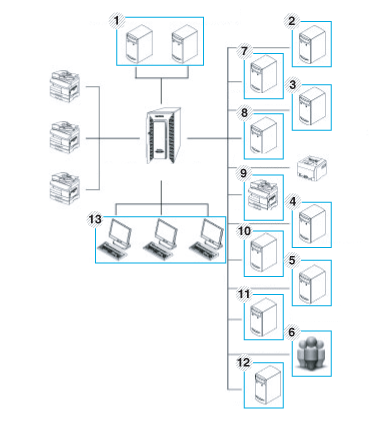
SmarThru™ Workflow is a document sending solution that allows users to operate devices on the network by performing a set of pre-constructed tasks called a “Workform.” These Workforms allow repetitive and time-consuming tasks to be automated, making the users’ work days less tedious and more productive.
|
1 |
LDAP Server, Domian Server |
8 |
FTP Server |
|
2 |
Microsoft Sharepoint Server |
9 |
Fax Server |
|
3 |
Network Folder |
10 |
Google Docs |
|
4 |
PCFax Server |
11 |
E-mail Server |
|
5 |
Database |
12 |
Client Systems |
|
6 |
User |
||
|
7 |
SMTP Server |
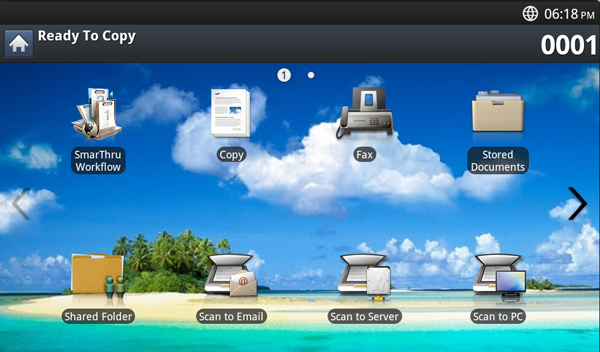
Understanding the SmarThru Workflow screen
To use the feature, press on the Main screen.
![[Note]](../common/note.png)
|
|
|
To switch to the other display screen, press the left or right arrow on the display screen. |
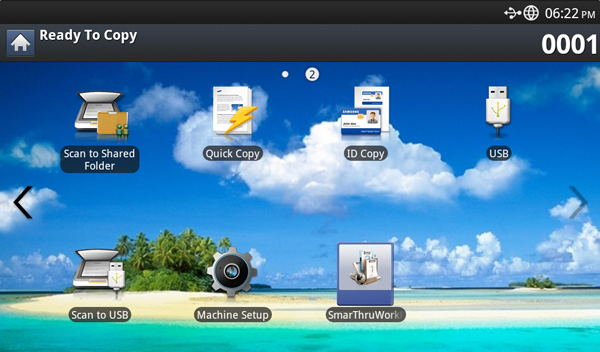
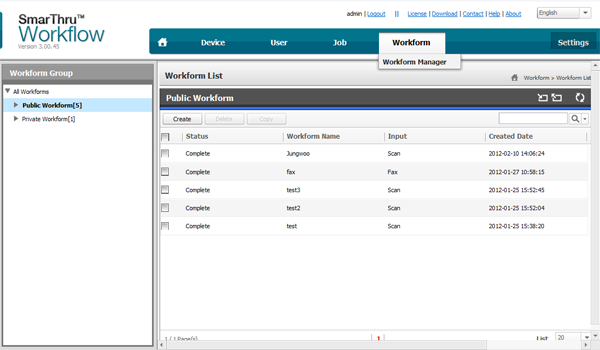
Workflow Screen
What are “Workform” and “Metadata”?
A “Workform” is a work process created by combining various embedded plug-ins together to achieve a desired end result for a document.
Metadata is extra information provided by the Workform creator for Workforms that use or input plug-ins.
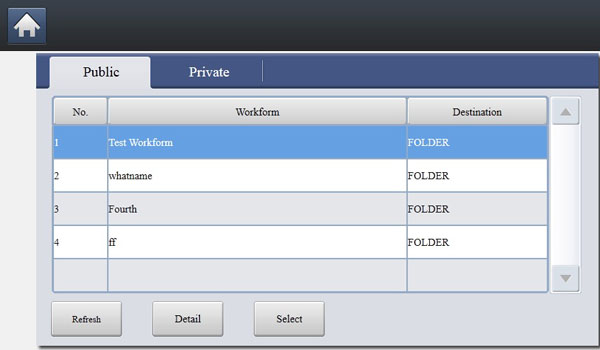
Public Workform Tab
The tab shows public Workforms created for user groups by an administrator.
-
: Refresh the Workform information.
-
: Shows the details of a Workform.
-
: Select the Workform for job execution
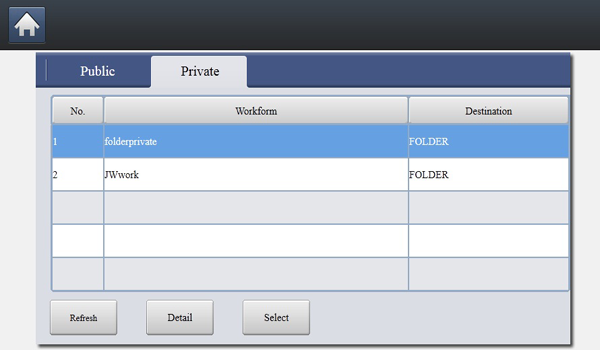
Private Workform Tab
The tab shows private Workforms created for a private user by the current authenticated user.
-
: Refresh the Workform information.
-
: Shows the details of Workform.
-
: Let users move to next screen for more options.
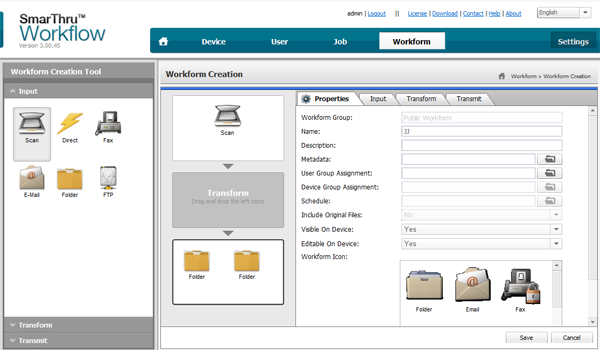
Workform Creation Screen
Add a new Workform, execute SmaThru Workflow and log in. You can create a maximum of 100 public Workforms.
|
|
|
|
SmaThruWorkflow should be installed on the network server. To install SmaThruWorkflow refer to the Administrator’s Guide on the supplied CD. |
Workform Creation
-
Excute SmaThruWorkflow
(Programs>SmarThru Workflow>SmarThru Workflow).
-
Enter your ID and Password to log into the system.
-
Select > Workformanager from the main menu.
-
Select whether it will be a or from the left pane.
-
Click Create.
The Workform Creation page opens.
-
Enter the workform’s properties.
-
Drag-and-drop the plug-ins from the left pane to the appropriate section in the data pane, or click on the green checkmark that appears in the icon’s upper-right corner.
Each task in the workform will be performed in the order in which they appear in the workform.
-
Click Save.
The Workform will appear on the page.
-
If the status is Incomplete, a plug-in has not been configured completely. Select the workform and click Edit to make changes to the Workform.
Workform execution
Users can operate various jobs with Workforms.
-
Press on the main screen.
-
Press one of the Workforms in the list and Select.
-
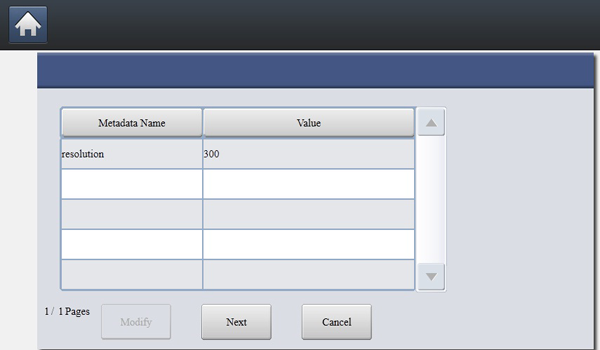
Press metadata and Next.
-
: Allows users to modify the selected metadata information.
-
: Lets user select next metadata.
-
: Quit without saving.
-
-
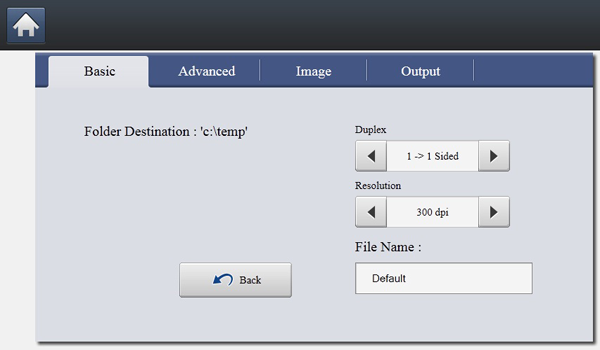
If you want to change the settings, change parameters in the Basic, Advanced, Image and Output tabs.
-
Press start on the control panel. The result files will be saved in the location that you set up while you created the Workform.
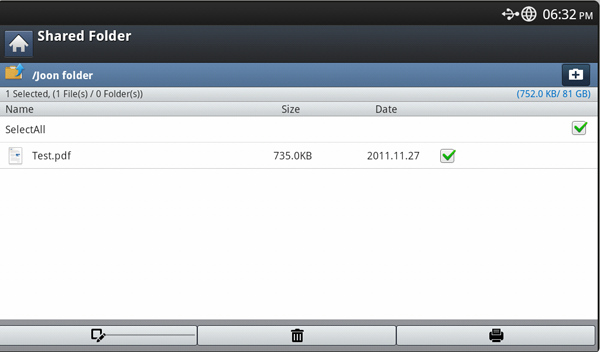
This feature allows you to use the machine’s memory as a shared folder. The advantage of this feature is that you can conveniently use the shared folder through your computer.
|
|
|
|
The administrator can set the ID and password to restrict the user’ s access and also set the maximum number of simultaneous users. |
Creating a shared folder
-
Open the Windows Explorer window from the computer.
-
Enter the printer’s \\[ip address] (example:\\169.254.133.42) in the address field, and press the Enter key or click .
-
Create a new folder under directory.
Using the shared folder
You can use the shared folder in the exact same way as a normal computer. Create, edit, and delete the folder or file as a normal Windows folder. You also store scanned data in the shared folder. You can directly print files stored in the shared folder. You can print TIFF, BMP, JPEG, and PRN files.
You can store documents sent from computers or scanned images in the . The is located on your machine’s hard disk drive (HDD), which means the documents are stored on the HDD. You can create a password for a certain Stored Document, so unauthorized users cannot access it. Also, you can print stored documents by using a variety of printing features and send the documents to several destinations such as email, server, or fax. You can set a Stored Document and use Stored Document feature with SyncThru™ Web Service (see Setting up an address book using SyncThru™ Web Service).
|
|
|
|
If important data is stored in the , we recommend you to backup the data regulary. Samsung disclaims all responsibility for damage or loss of data caused by misuse or failure of the machine. |
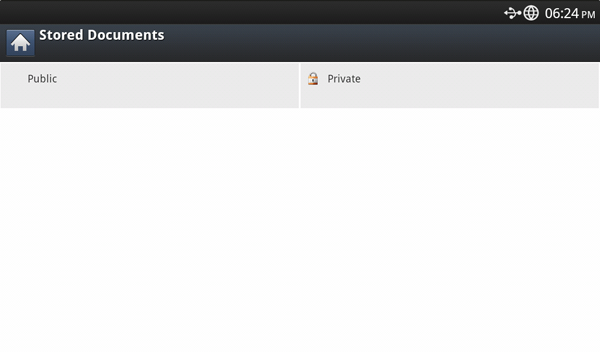
To use the feature, press on the display screen.
allows you to store the scanned data on the HDD (your machine's hard disk drive) in your machine. The stored data can be sent to different destinations like , , , , or .
-
Public: All users can access the files.
-
Private: Set up a password to prevent unauthorized persons from accessing.