When a paper jam occurs, a warning message appears on the display screen.
|
|
|
|
To avoid tearing the paper, pull the jammed paper out slowly and gently. Follow the instructions in the following sections to clear the jam. |
Original paper jam in front of scanner
|
|
|
|
To prevent document jams, use the scanner glass for thick, thin, or mixed paper-type originals. |
-
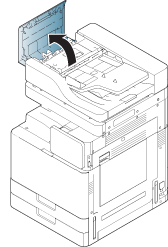
Remove any remaining pages from the DSDF.
-
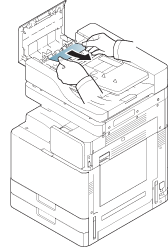
Open the DSDF cover.
-
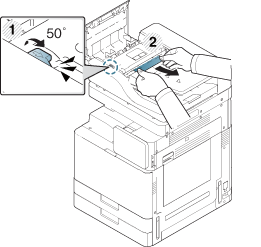
Lift the lever as below picture and gently remove the jammed paper from the DSDF.
-
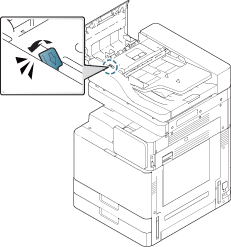
Pull down the lever.
-
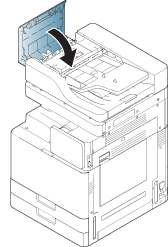
Close the DSDF cover.
Original paper jam inside of scanner
|
|
|
|
To prevent document jams, use the scanner glass for thick, thin, or mixed paper-type originals. |
-
Remove any remaining pages from the DSDF.
-
Open the DSDF cover.
-
Gently remove the jammed paper from the DSDF.
If you do not see paper in this area, go to the next step.
-
Open the DSDF input tray.
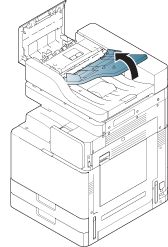
-
Pull the jammed paper gently out of the DSDF.
If you do not see paper in this area, go to the next step.
-
Close DSDF cover and DSDF input tray.
-
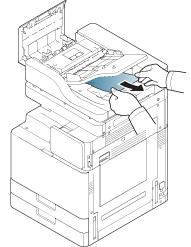
Open the DSDF.
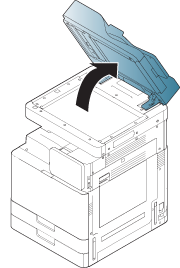
-
Grasp the misfed paper, and remove the paper from the feed area by carefully pulling it using both hands.
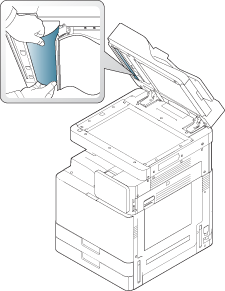
-
Close the DSDF.
Paper jam in tray 1, 2
|
|
|
|
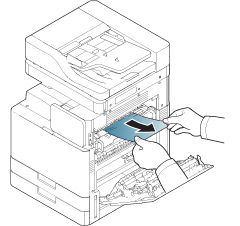
The fuser area is hot. Take care when removing paper from the machine. |
-
Open the right door.

-
Remove the jammed paper by gently pulling it straight out.
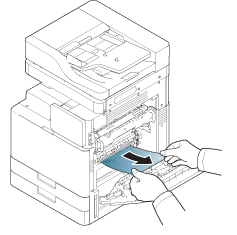
Close the right door.
If you do not see paper in this area, go to the next step.
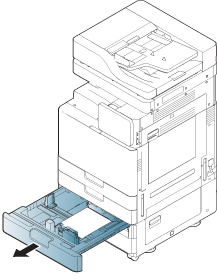
-
Pull out tray 1 or 2.
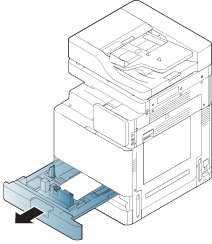
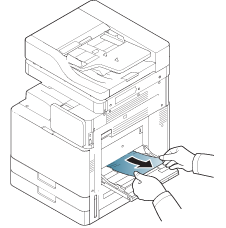
-
Remove the jammed paper from the machine.
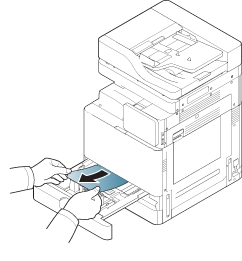
-
Insert tray 1 or 2 back into the machine until it locks into place. Printing automatically resumes.
Paper jam in tray 3, 4
-
Open the right bottom door of the dual cassette feeder.
-
Remove the jammed paper by gently pulling it straight out.
Close the dual cassette feeder right bottom door.
If you do not see paper in this area, go to the next step.
-
Pull out tray 3 or 4.
-
Remove the jammed paper from the machine.

-
Insert tray 3 or 4 back into the machine until it locks into place. Printing automatically resumes.
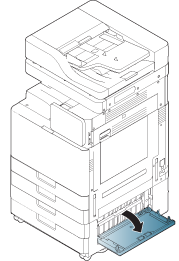
Paper jam in the multi-purpose tray
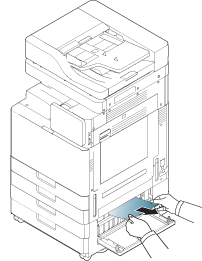
-
If the paper is not feeding properly, pull the paper out of the machine.
-
Open and close the front door to resume printing.
Paper jam inside the machine (Jam feed 1, Jam feed 2)
|
|
|
|
The fuser area is hot. Take care when removing paper from the machine. |
-
Open the right door.
-
Remove the jammed paper by gently pulling it straight out.
-
Close the right door.
Paper jam inside the machine (Jam feed 3, Jam feed 4)
-
Open the right bottom door of the dual cassette feeder.
-
Remove the jammed paper by gently pulling it straight out.
-
Close the dual cassette feeder right bottom door.
Paper jam inside the machine (Jam Registration)
|
|
|
|
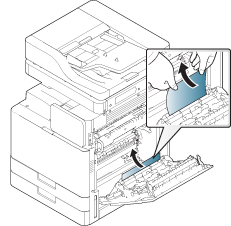
The fuser area is hot. Take care when removing paper from the machine. |
-
Open the right door.
-
Remove the jammed paper by gently pulling it straight out.

-
Close the right door.
Paper jam inside of the machine (Jam at Fuser out)
|
|
|
|
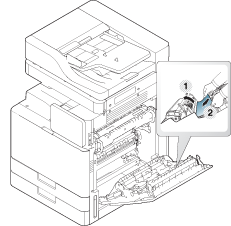
The fuser area is hot. Take care when removing paper from the machine. |
-
Open the right door.
-
Then remove the jammed paper by gently pulling it straight out.
-
Close the fuser cover and the right door.
Paper jam at the top of duplex path (Jam Duplex Return, Jam Duplex 1)
|
|
|
|
The fuser area is hot. Take care when removing paper from the machine. |
-
Open the right door.
-
Remove the jammed paper by gently pulling it straight out.
-
Close the right door.
Paper jam at the inside of duplex path (Jam Duplex 2)
|
|
|
|
The fuser area is hot. Take care when removing paper from the machine. |
-
Open the right door.
-
Remove the jammed paper by gently pulling it straight out.
-
Close the right door.
Paper jam bottom of duplex path (Jam Duplex Regi.)
|
|
|
|
The fuser area is hot. Take care when removing paper from the machine. |
-
Open the right door.
-
Remove the jammed paper by gently pulling it straight out.
-
Close the right door.
Paper jam in exit area (Jam Exit Face down)
-
Gently pull the paper out of the output tray.
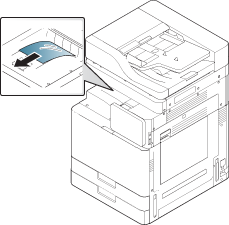
-
Open and close the front door. Printing automatically resumes.
|
|
|
|
If this paper jam persists, make sure the bin full sensor is unfolded. The bin full sensor is located in front of the output tray. 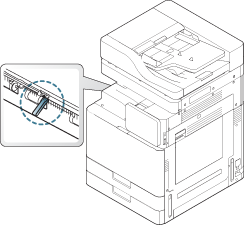
|