If printing quality problems occur or if you use your machine in a dusty environment, you need to clean your machine regularly to keep the best printing condition and use your machine longer.
|
|
|
|
Read the following precautions before cleaning the machine: any damages due to user’s mis-handling is not covered by the warranty: |
-
Turn the machine’s power off and unplug all the power cords.
-
Do not disassemble the machine without following the instructions in this guide.
-
Do not clean the machine with cleaning materials containing large amounts of alcohol, solvent, or other strong substances. They can discolor or distort the cabinet.
-
Do not use a vacuum cleaner to clean the toner dust, we recommend you use a cloth or tissue dampened with water to clean it. If you use a vacuum cleaner, toner blows into the air and might be harmful to you.
-
When using a dampened cloth, be careful not to drip any water into the machine: it might cause an electric shock.
-
For more safety issues, refer to the safety information chapter in the User’s Guide.
Clean the machine cabinet with a soft, lint-free cloth. Dampen the cloth slightly with water, but be careful not to let any water drip onto or into the machine.
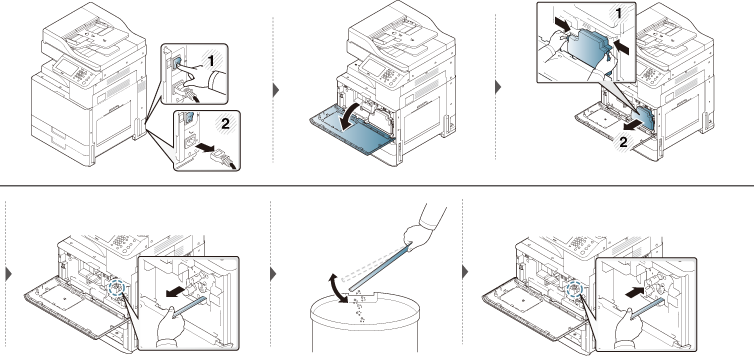
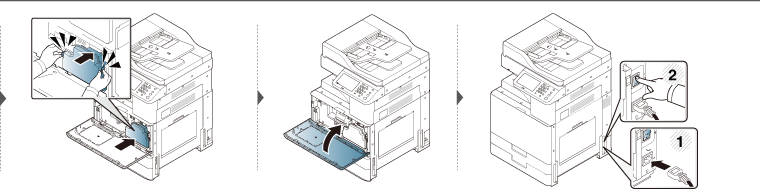
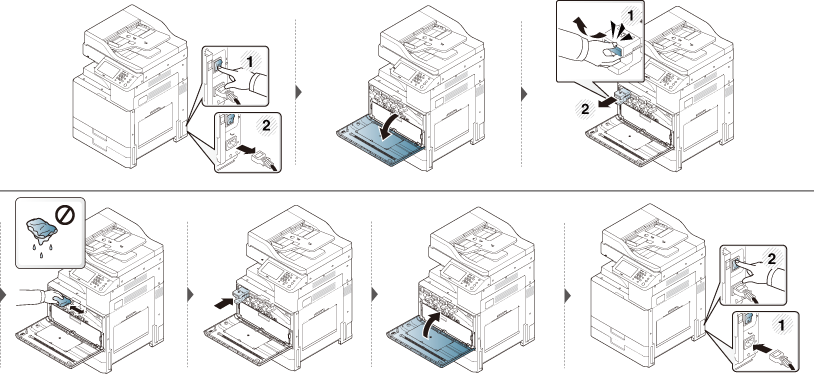
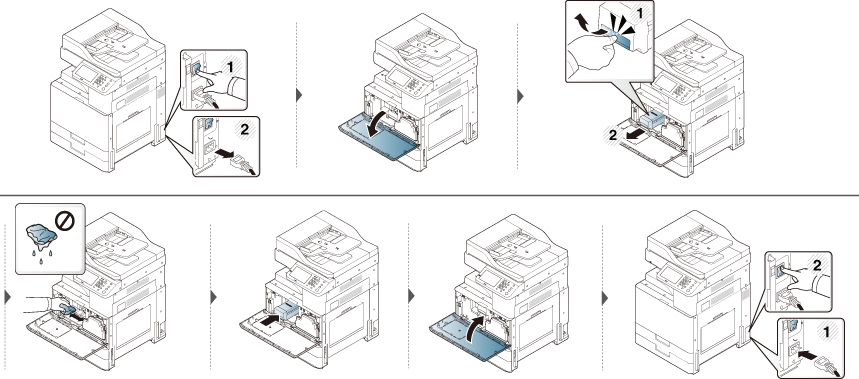
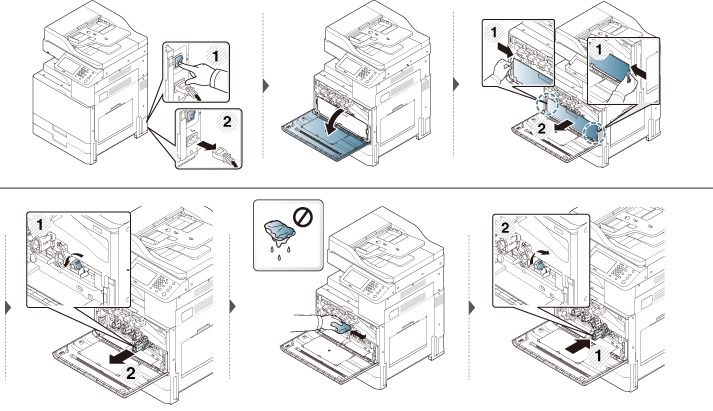
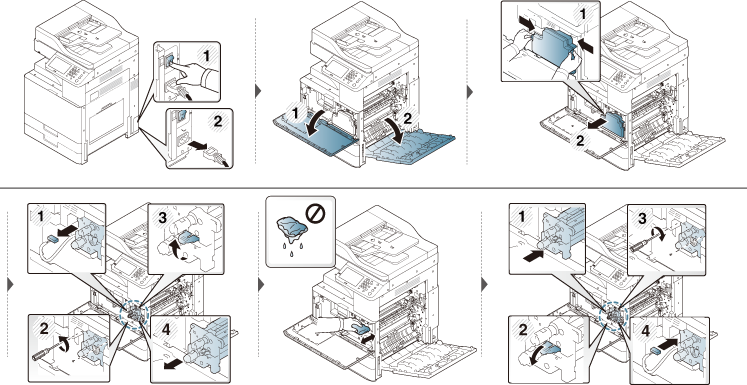
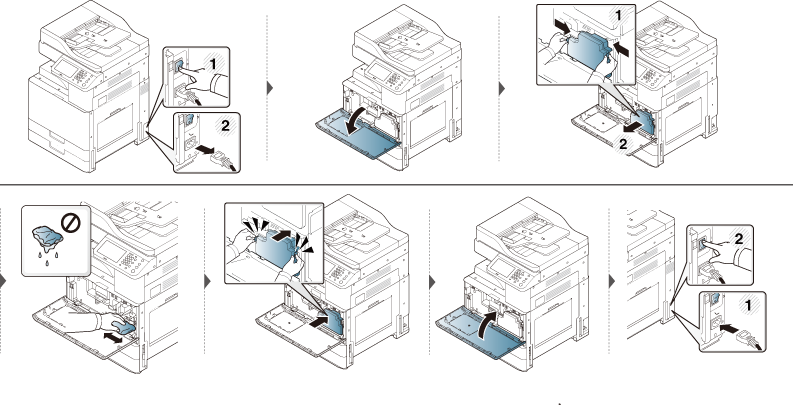
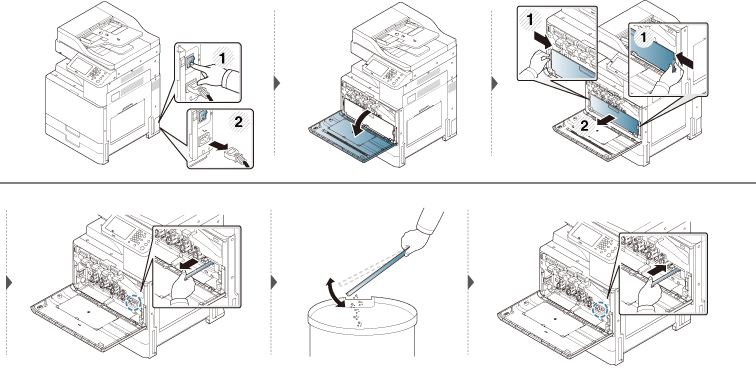
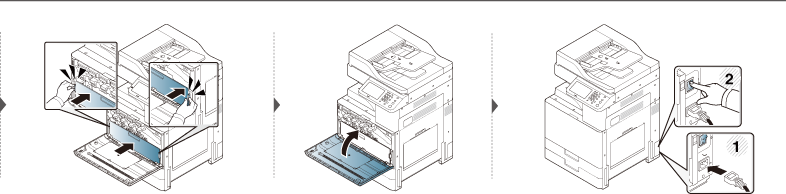
During the printing process, paper, toner, and dust particles can accumulate inside the machine. These accumulations can cause print quality problems, such as toner specks or smearing. Cleaning the inside of the machine clears and reduces printing quality problems.
|
|
|
|
Use a dry lint free cloth when cleaning the inside of the machine, be careful not to damage the transfer roller or any other inside parts. Do not use solvents such as benzene or thinner. Printing quality problems can occur and cause damage to the machine. |
|
|
|
|
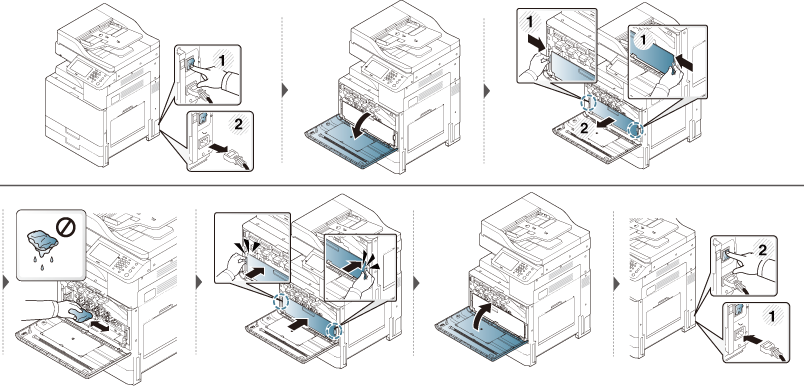
X322x/ X328x series
K325x/ K330x series
|
|
|
|
|
|
|
|
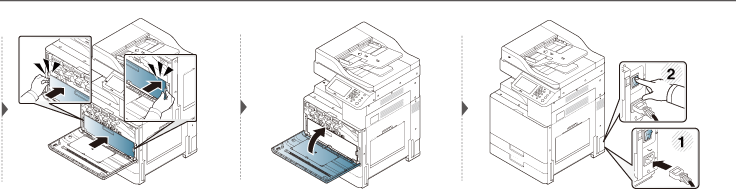
If the front door is not completely closed, the machine will not operate. |
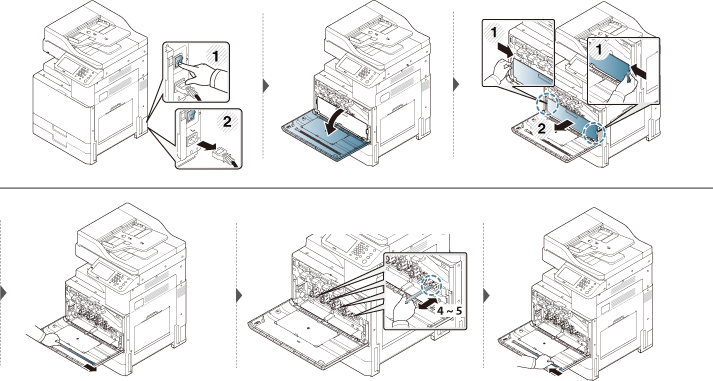
X322x/ X328x series
K325x/ K330x series
|
|
|
|
If the front door is not completely closed, the machine will not operate. |

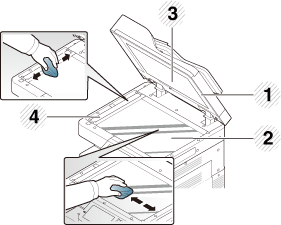
Keeping the scan unit clean helps to ensure the best possible copy quality. We suggest that you clean the scan unit at the start of each day and during the day, as needed.
|
|
|
|
-
Prepare a soft, lint-free cloth.
-
Open the scanner lid.
-
Wipe the surface of the scanner glass and the document feeder glass with the cloth until it is clean and dry. Wipe the underside of the scanner lid and white sheet until it is clean and dry.
-
Scanner lid
-
Scanner glass
-
White sheet
-
Document feeder glass
-
-
Close the scanner lid.
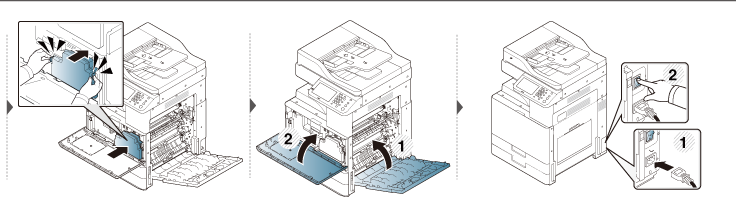
The paper dust stick and the chargers of the imaging unit will need to be cleaned after a specified number of paper is printed out. When the message that demands you to clean the chargers of the imaging unit appears, you have to clean the paper dust stick first. Then clean the chargers. The time when the message appears depends on environmental factors like altitude, temperature, humidity, and so on. You need to clean the charger to maintain printing quality. If cleaning is done, the message will disappear automatically.
X322x/ X328x series
K325x/ K330x series