Installing driver over the network
|
|
|
|
-
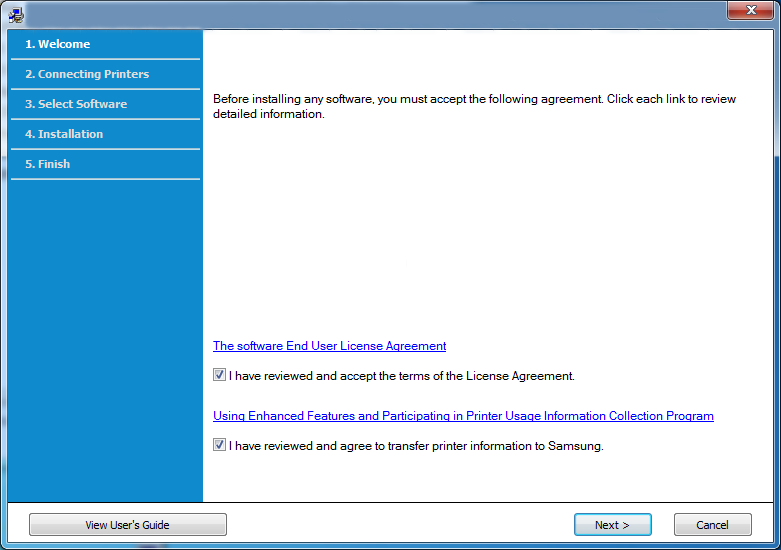
Make sure that the machine is connected to the network and powered on. Also, your machine’s IP address should have been set (see Setting IP address).
-
Insert the supplied software CD into your CD-ROM drive.
-
Read and check and . Then, click .
-
Select on the screen. Then, click .
-
If the window appears, check that the machine is connected to your network. Then, click .
![[Note]](../../common/icon_note.png)
The firewall software might be blocking network communication. Before connecting the device to the network, disable the computer’s firewall.
-
The searched machines will be shown on the screen. Select the one you wish to use and click .
-
Follow the instructions in the installation window.
Silent installation Mode
Silent installation mode is an installation method that does not require any user intervention. Once you start the installation, the machine driver and software are automatically installed on you computer. You can start the silent installation by typing or in the command window.
Command-line Parameters
Following table shows commands that can be used in the command window.
|
|
|
|
Following command-line are effective and operated when command is used with or . But , or /? are exceptional commands that can be operated solely. |
|
Command- line |
Definition |
Description |
||||||
|---|---|---|---|---|---|---|---|---|
|
/s or/S |
Starts silent installation. |
Installs machine drivers without prompting any UIs or user intervention. |
||||||
|
/p”<port name>” or/P”<port name>” |
Specifies printer port.
|
Printer port name can be specified as IP address, hostname, USB local port name or IEEE1284 port name. For example:
|
||||||
|
/a”<dest_path>” or/A”<dest_path>” |
Specifies destination path for installation.
|
Since machine drivers should be installed on the OS specific location, this command applies to only application software. |
||||||
|
/i”<script filename>” or/I”<script filename>” |
Specifies customized install script file for custom operation.
|
Customized script file can be assigned for customized silent installation. This script file can be created or modified through provided installer customizing utility or by text editor.
|
||||||
|
/n”<Printer name>” or/N”<Printer name>” |
Specifies printer name. Printer instance shall be created as specified printer name. |
With this parameter, you can add printer instances as your wishes. |
||||||
|
/nd or/ND |
Commands not to set the installed driver as a default machine driver. |
It indicates installed machine driver will not be the default machine driver on your system if there are one or more printer drivers installed. If there is no installed machine driver on your system, then this option won’t be applied because Windows OS will set installed printer driver as a default machine driver. |
||||||
|
/x or/X |
Uses existing machine driver files to create printer instance if it is already installed. |
This command provides a way to install a printer instance that uses installed printer driver files without installing an additional driver. |
||||||
|
/up”<printer name>” or/UP”<printer name>” |
Removes only specified printer instance and not the driver files. |
This command provides a way to remove only specified printer instance from your system without effecting other printer drivers. It will not remove printer driver files from your system. |
||||||
|
/d or/D |
Uninstalls all device drivers and applications from your system. |
This command will remove all installed device drivers and application software from your system. |
||||||
|
/v”<share name>” or/V”<share name>” |
Shares installed machine and add other available platform drivers for Point & Print. |
It will install all supported Windows OS platform’s machine drivers to system and share it with specified <share name> for point and print. |
||||||
|
/o or /O |
Opens folder after installation. |
This command will open folder after the silent installation. |
||||||
|
/h, /H or /? |
Shows Command-line Usage. |
|||||||
-
Make sure that the machine is connected to your network and powered on.
-
Insert the supplied software CD into your CD-ROM drive.
-
Double-click the CD-ROM icon that appears on your Macintosh desktop.
-
Double-click the folder > icon.
-
Click .
-
Read the license agreement and click .
-
Click to agree to the license agreement.
-
When the message which warns that all applications will close on your computer appears, click .
-
Click on the .
If you have not set the IP address yet, click Set IP address and refer to IPv4 configuration using SetIP (Macintosh). If you want to set the wireless setting, refer to Setup using Macintosh.
-
Click . All components necessary for machine operations will be installed.
If you click , you can choose individual components to install.
-
Enter the password and click .
-
Installing software requires you to restart your computer. Click .
-
After the installation is finished, click or .
-
Open the folder > > .
-
For Mac OS X 10.5-10.7, open the folder > and click .
-
-
Click on the .
-
For Mac OS X 10.5-10.7, click the “” icon. A display window will pop up.
-
-
For Mac OS X 10.4, click .
-
For Mac OS X 10.5-10.7, click .
-
-
Select in .
When printing a document containing many pages, printing performance may be enhanced by choosing for option.
-
Enter the machine’s IP address in the input field.
-
Enter the queue name in the input field. If you cannot determine the queue name for your machine server, try using the default queue first.
-
For Mac OS X 10.4, if Auto Select does not work properly, select in and your machine name in .
-
For Mac OS X 10.5-10.7, if Auto Select does not work properly, choose and your machine name in .
-
-
Click .
Your machine appears in the , and is set as the default machine.
|
|
|
|
To install the fax driver:
|
You need to download Linux software packages from the Samsung website to install the printer software (http://www.samsung.com > find your product > Support or Downloads).
|
|
|
|
To install other software: |
Install the Linux driver and add network printer
-
Make sure that the machine is connected to your network and powered on. Also, your machine’s IP address should have been set.
-
Download the Unified Linux Driver package from the Samsung website.
-
Extract the UnifiedLinuxDriver.tar.gz file and open the new directory.
-
Double-click the folder > icon.
-
The Samsung installer window opens. Click .
-
The add printer wizard window opens. Click .
-
Select network printer and click button.
-
The machine’s IP address and model name appears on list field.
-
Select your machine and click .
-
Input the printer description and .
-
After the machine is added, click .
-
When installation is done, click .
Add a network printer
-
Double-click the .
-
Click
-
The window opens. Click .
-
Select and click the button.
-
The printer’s IP address and model name appears on list field.
-
Select your machine and click .
-
Enter the printer description and click .
-
After the machine is added, click .
|
|
|
|
To use the UNIX printer driver, you have to install the UNIX printer driver package first, then setup the printer. You can download the UNIX printer driver package from the Samsung website ((http://www.samsung.com > find your product > Support or Downloads).
Installing the UNIX printer driver package
The installation procedure is common for all variants of UNIX OS mentioned.
-
From the Samsung website, download and unpack the UNIX Printer Driver package to your computer.
-
Acquire root privileges.
“”
-
Copy the appropriate driver archive to the target UNIX computer.
See administration guide of your UNIX OS for details.
-
Unpack the UNIX printer driver package.
For example, on IBM AIX, use the following commands.
“ enter the package name ”
-
Go to the unpacked directory.
-
Run the install script.
“”
is the installer script file which is used to install or uninstall the UNIX Printer Driver package.
Use “” command to give the permission to the installer script.
-
Execute the “” command to verify installation results.
-
Run “” from the command line. This will bring up the window. Setup the printer in this window referring to the following procedures.
On some UNIX OS, for example on Solaris 10, just added printers may not be enabled and/or may not accept jobs. In this case run the following two commands on the root terminal:
“”
“”
Uninstalling the printer driver package
|
|
|
|
The utility should be used to delete the printer installed in the system.
|
To re-install it, use the command “” to reinstall the binaries.
Setting up the printer
To add the printer to your UNIX system, run ‘installprinter’ from the command line. This will bring up the Add Printer Wizard window. Setup the printer in this window according to the following steps:
-
Type the name of the printer.
-
Select the appropriate printer model from the model list.
-
Enter any description corresponding to the type of the printer in the field. This is optional.
-
Specify any printer description in the field. This is optional.
-
Specify the printer location in the field.
-
Type the IP address or DNS name of the printer in the textbox for network-connected printers. On IBM AIX with , only the DNS name is possible-numeric IP address is not allowed.
-
shows the connection as or in the corresponding list box. Additionally, type is available on Sun Solaris OS.
-
Select to set the number of copies.
-
Check the option to receive copies already sorted.
-
Check the option to receive copies in the reverse order.
-
Check the option to set this printer as default.
-
Click to add the printer.