Installing the driver over the wireless network

[Note]
  • Samsung Printer Experience app can only be used in the Start screen when V4 driver is installed. The V4 driver is automatically downloaded from the Windows Update if your computer is connected to the Internet. If not, you can manually download the V4 driver from Samsung website, www.samsung.com >find your product > Support or downloads.

  • If you install the driver using the supplied software CD, V4 driver is not installed. If you want to use the V4 driver in the Desktop screen, you can download from the Samsung website, www.samsung.com >find your product > Support or downloads.

  • You must set up for wireless network using the supplied software CD in Desktop screen mode.

  • If you are using a computer without a CD-ROM, you can set up the wireless network from the machine’s control panel (see Wireless network setup).

From the Start Screen

  1. After completing the wireless network connection, you need to install a machine driver to print from an application.

  2. From Charms, select Settings > Change PC settings > Devices.

  3. Click Add a device.

    Discovered machines will be shown on the screen.

  4. Click the model name or host name you wish to use.

    [Note]

    You can print a Network Configuration Report from the machine’s control panel that will show the current machine’s host name (see Printing a network configuration report).

  5. The driver is automatically installed from the Windows Update.

[Note]
  • If you want to install Samsung’s printer management tools, you need to install them using the supplied software CD (see From the Desktop Screen).

  • You can download Samsung Printer Experience app from the Windows Store. You need have a Microsoft account to use the Windows Store.

    1. From Charms, select Search.

    2. Click Store.

    3. Search and click Samsung Printer Experience.

    4. Click Install.

From the Desktop Screen

[Note]

If you install the driver using the supplied software CD, you cannot use the installed driver from the Start screen.

  1. Turn on your computer, access point, and machine.

  2. Insert the supplied software CD into your CD-ROM drive.

    If the installation window does not appear, from Charms, select Search > Apps and search for Run. Type in X:\Setup.exe, replacing “X” with the letter that represents your CD-ROM drive and click OK.

    [Note]

    If “Tap to choose what happens with this disc.” pop-up window appears, click the window and select Run Setup.exe.

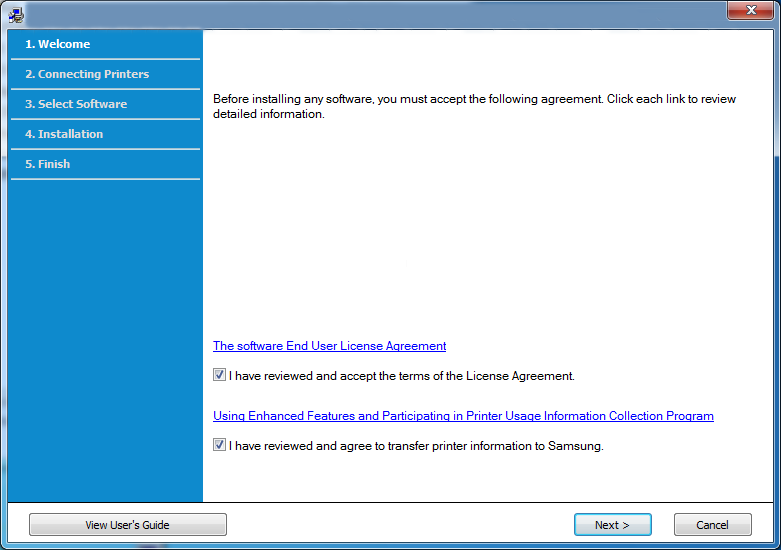
  3. Read and accept The software End User License Agreement and Using Enhanced Features and Participating in Printer Usage Information Collection Program (optional). Then, click Next.

  4. Select Configure the wireless network connection using USB cable on the Printer Connection Type screen. Then, click Next.

  5. Follow the instructions in the installation window.

    [Note]

    For wireless set up or driver installation, refer to the wireless network setup chapter (see Wireless network setup).