A locally connected machine is a machine directly attached to your computer using the cable. If your machine is attached to a network, skip the following steps below and go on to installing a network connected machine’s driver (see Installing driver over the network).
|
|
|
|
Windows
-
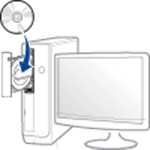
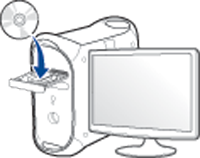
Make sure that the machine is connected to your computer and powered on.
-
Insert the supplied software CD into your CD-ROM drive.
If the installation window does not appear, click > > > .
X:\ replacing “X” with the letter, which represents your CD-ROM drive and click .
-
For Windows 8,
If the installation window does not appear, from , select > and search for . Type in X:\Setup.exe, replacing “X” with the letter that represents your CD-ROM drive and click .
If “.” pop-up window appears, click the window and select .
-
-
Review and accept the installation agreements in the installation window, and then click .
-
Select on the screen, and then click .
-
Follow the instructions in the installation window.
From the Windows 8 Start Screen
|
|
|
|
-
Make sure that your computer is connected to the Internet and powered on.
-
Make sure that the machine is powered on.
-
Connect the computer and the machine with a USB cable.
The driver is automatically installed from the .
Mac
-
Make sure that the machine is connected to your computer and powered on.
-
Insert the supplied software CD into your CD-ROM drive.
-
Double-click the CD-ROM icon that appears on your Mac desktop.
-
For Mac OS X 10.8, double-click the CD-ROM that appears on .
-
-
Double-click the folder > icon.
-
Click .
-
Read the license agreement and click .
-
Click to agree to the license agreement.
-
Click . All components necessary for machine operations will be installed.
If you click , you can choose individual components to install.
-
Enter the password and click (or ).
-
Select on the and click .
-
Click button to select your printer and add it to your printer list.
-
Click .
-
After the installation is finished, click .
Linux
You need to download Linux software packages from the Samsung website to install the printer software (http://www.samsung.com > find your product > Support or Downloads).
Installing the Unified Linux Driver
|
|
|
|
You must log in as a super user (root) to install the machine software. If you are not a super user, ask your system administrator. |
-
Make sure that the machine is connected to your computer and powered on.
-
Copy package to your system.
-
Open Terminal program and go to the folder that you copied the package to.
-
Extract the package.
-
Move to folder.
-
Execute "./" command (If you're not logged in as root, execute the command with "" as "")
-
Proceed with installation.
-
When installation finished, launch printing utility(Go to > > or execute "" command in Terminal program).
-
Click button.
-
Select your printer.
-
Click button and add it to your system.