The paper setting in the machine and driver should match to print without a paper mismatch error.
To change the paper setting set in the machine, from SyncThru™ Web Service click tab > > > (see Settings tab).
Or, you can set it from the control panel.
Then, set the paper type from the window > tab > (see Opening printing preferences).
After loading paper in the paper tray, set the paper size and type using the display screen.
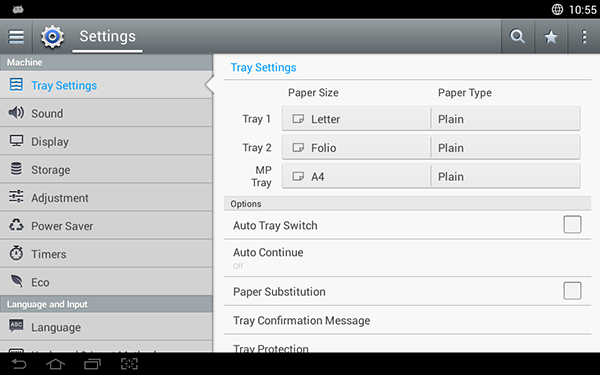
Tray Settings
To change detailed tray settings, tap > and select the tray and options you want on the display screen.
-
: You can set the and .
-
: Allows you to change the paper size.
-
You can change the paper list on the display screen. The paper lists are divided into the available A/B type and letter type paper in this machine.
-
If there is no required size paper or you need to use custom sized paper, tap the cardinal point arrows to set the paper size. You can also set and save the custom size using . You can select the custom size whenever you need it.
-
Options
Scroll through the options by swiping up and down.
-
: Determine whether or not the machine continues printing when it detects the paper does not match. For example, if both tray 1 and tray 2 are filled with the same size paper, the machine automatically prints from tray 2 after the tray 1 runs out of paper.
-
: This option allows you to continue printing when the paper size you have set is mismatched with the paper in the tray. When this option is activated, the machine continues printing using similar or large size paper. If this option is inactivated, the machine waits until the required size paper is loaded in the tray.
-
: When the requested paper for a print job is not available in the tray, this feature allows you to substitute similar paper size, For example, if the requested letter sized paper is not available in the tray, this machine substitutes A4 for the requested paper.
![[Note]](../../common/icon_note.png)
When the paper is substituted, some image loss may occur.
-
: When you load paper into a tray, you can set the confirmation message to appear automatically. This machine can detect some paper sizes and types automatically. If you want to set the paper size and type, or the machine cannot detect them, you can set the size and type directly in the confirmation window.
-
: If you set tray 1 to , for example, then tray 1 is excluded during tray switching.
This setting works for copy or print jobs: It doesn't affect fax jobs.
-
: You can set the tray priority. If first setting is tray 1, the machine automatically prints from tray 1 after the second setting tray runs out of paper.